Monday, August 19, 2013

AQS Grand Rapids and it's time to come clean, everyone...

Me and "Folk Art in the Vineyard"

I had WAY too much fun in Grand Rapids at the AQS show last Friday.  My black "Folk Art in the Vineyard" wall hanging just seemed to melt into the black draped display, making it look a little mysterious.  My quilt was hung not too far from Lori Smith's booth (From My Heart To Your Hands)...she just had to lean over a little to see it.  The center blocks from my quilt were made from her pattern, "Folk Art Applique."

Jo, Judy and me

It was fun to go with Judy and meet up with other quilting friends for lunch, dinner, and show-and-tell of our purchases.


I had the opportunity to meet Sharon (currently no blog), a cyber quilting friend, in person and take pictures in front of our quilts! We have so much in common (born in the south, re-planted in the Midwest, love hand applique...).  She brought me this beautiful little bag of goodies that she had made (I was so overwhelmed!).


I am still discovering little details like the homemade attached rose and the little eyeglasses zipper pull...too cute!


And look at all the fun stuff inside!  (including a matching little tissue holder...)


Jill, of Berry Wood Lane, and I were hoping to meet at the show, but we ended up going on different days...this is her beautiful "Sunshine Sherbet," made with cheerful, sunny 30's fabrics, (picture posted with her permission).


I did my part for the economy, but found that I didn't need to report my credit card as "stolen," LOL.  I was a GOOD girl!  I did get a couple of patterns from Lori's booth...I love EVERYTHING she does.


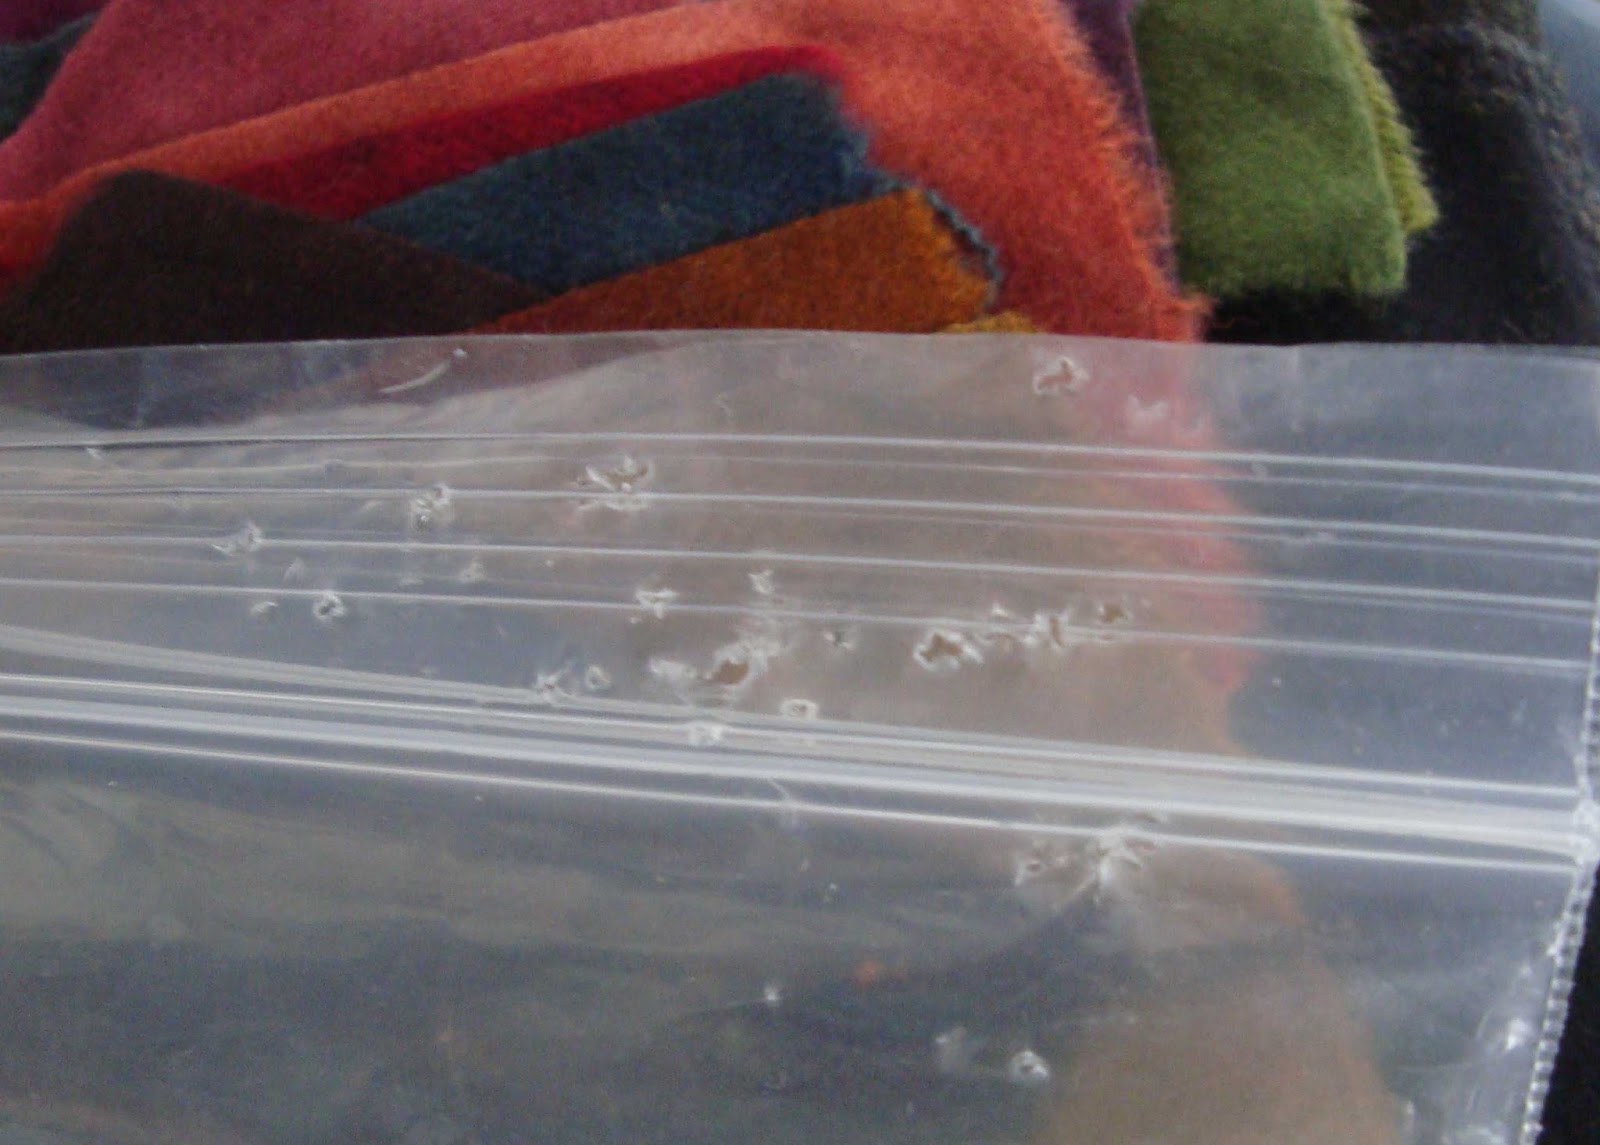
I also stopped by the Primitive Gatherings booth...danger, danger!! I bought a wool applique kit to make as a Christmas gift.  Can you believe that I have never worked with wool?!?  I don't own any, so I had to buy a kit.  Their sample was just irresistible...I guess that is why they make them...


Look at all the beautiful colors of wool!  It will be fun not to worry about turning the edges under for a change...


Of course, my kwazy kat had to "staple" all the pattern and kit bags that I brought home (he was a stapler in a previous life).


I also got a cone of Aurefil thread for piecing and these cute little "minders" for balls of pearl cotton embroidery thread.  Don't they look just like the little goodie containers holding prizes that came out of those machines you put 25 cents into (next to the bubble gum machine, in the arcade)?  I bought them because they are practical and because I was feeling a little nostalgic.


And look what I found for a certain someone recovering from a knee procedure...I think I really shocked my show companion when I stopped at THIS booth (this is all they were selling in that particular booth, and they were making a KILLING!).


Yes, I am afraid it IS what you think it is..."bow-chicka-bow-bow..."


OK...now time to pose a question...
What is the funniest/weirdest way you have sneaked quilt show or quilt shop purchases into your house/stash?  I've heard stories of disguises and secret compartments, spare tire storage areas of car trunks filled with bags of fabric (but no tire...).  Time to fess up (WE won't tell...).
In stitches,
Teresa   :o)


Wednesday, August 14, 2013

How to build a banjo...and a hound dog!


It is MUCH easier to build a banjo from fabric than from wood! With the help of my trusty freezer paper, Elmer's glue stick and little bottle of Roxanne's glue baste, I started building the body of the instrument first.  (I can see I will have a little trimming to do on the back after hand stitching as I can see too much dark shadow showing through the banjo's "face" - from the darker arcs of fabric that surround the large, neutral circle.)

This will be another block for the "Baltimore Rhapsody" project.


Once most of the rings of the body are glue-basted, it is on to the neck of the instrument.  Pattern weights make accuracy easier to achieve with my fumbly, clumsy fingers.  With part of the motif anchored by a pattern weight or two, I can easily pry up the edge I want to work on without scooting the piece off the pattern drawing.  

(When remembering "dot-dot-not-a-lot" with the glue baste, there is no danger of gluing my motif to the pattern paper...teenie-tiny dots of glue baste go a long way if you give them a couple of minutes to dry, mostly...I just plop a pattern weight on and go on to something else while adhesion is allowed to work.)


I really want the instruments to look life-like, which means paying attention to spacial dimension, perspective and shading as I draw them.  Designing in only two dimensions reduces the full beauty of the instrument design and makes them look too cartoon-ish for this "Baltimore Rhapsody" project.  


I really love this method of applique prep for doing these little slivers...now you SEE the freezer paper...


 ...now you DON'T!  No raw edges, and all ready to hand stitch to the background!


My poor hound dog looks a little freaky in pieces!  I have found a way of reverse appliqueing the eyes to make them easier and more life-like.  When I turned the outer edges of the head under and secured them to the wrong side with glue stick, I also turned under the edges of the eye sockets.  Then I "built" the eye, and made it so that it peeks out through the hole.  It is much easier than dealing with the really tiny pieces on top of the head.  

I will do a more detailed tutorial on how I did this next post because I think people are a little mystified by reverse applique.  I find that using the technique gets me out of some sticky, difficult applique situations.  


I usually leave the freezer paper adhered to the pieces until after I glue baste the unit together, working over the pattern.  That way I can be lazy and not get my light box out, but this time I removed the paper first (I already had it out, working on something else...).


I used different golden tan fabrics for the dog's body pieces so that I could avoid some outline embroidery later, but I am not sure there is enough difference in value and scale...I will probably still add some embroidery details later.


Now I add the antique milk can that the banjo is leaning against...


The banjo will get strings and lots of detail with the embroidery floss after it is stitched to the background and soaked to removed the glues.  

I have already hand appliqued these pieces together...I do this so I can trim the background away, if I choose to, later, in preparation for detailed hand quilting. I also find it easier to stitch motifs together in units before glue basting to backgrounds...I don't like handling the bulk of the big background any more than I have to!  

(And the units are very portable in a baggie as I taxi my daughter around to different things.)

Little skinny things, like those shadowing slivers on the banjo neck, I DON'T hand applique before putting on the backgrounds...stuff like that is too fiddly, could unravel, and is better stitched directly to the background. 


Now I need to work on prepping the vine and flower pieces so I can glue baste the whole block together.  Cheer up puppy dog...your banjo will be finished soon!

In stitches,
Teresa  :o)

Monday, August 12, 2013

The "CONTENTMENT" Quilt - Block 1, when we met


This is Block 1 of a new project called "CONTENTMENT," which will be a story quilt.  I've been reading about historical quilts that tell stories, especially "The Reconciliation Quilt."  I wanted to create a story quilt in the old style that would celebrate our 20th wedding anniversary this fall.  I also want to make an anniversary quilt for my parents in a similar style.

I've also been thinking about "contentment" this summer...and how most of us could be happy, if we really wanted to be.  When blessings are counted, gratitude given, and it all boils down, the only thing I really need more of is time to sew/design and spend with family and friends.  I thought that designing blocks celebrating life would be a great way to think about it.  I also liked the idea of recording some of the family history, some of our history.


This block commemorates the day we met in Ann Arbor, Michigan and will finish 10 inches square.  I wanted a large wall quilt, so I thought the 10-inch block size would be good.  If I publish these, I think I will offer 10-inch and 12-inch blocks...some elements in the 10-inch block are a little small!  I may prep another one to finish 12 inches square as well...but keep the letters the same size...

I have glue prepped a couple of blocks, but I want to think more about the appliqued letters before stitching them down.  I really don't want to embroider wordy details into blocks, and I am enchanted by these chunky letters.  We'll see.  I want to prep a few, then put them together and just see if the letters make things too busy.  I've got 6 or so blocks drafted and ready to play with.

I have been in and out of town multiple times this summer.  My daughter starts 11th grade this week, so WE WILL BE HOME FOR A WHILE...maybe I can get some things DONE!  (Although, I am going across the state a couple of days later this week to go to the AQS Grand Rapids show and lurk around my quilt entry...just like I am hiding behind it here, before mailing it off to Paducah last month...)


Thank you to everyone who has placed an order for "BALTIMORE RHAPSODY" music quilt blocks!  (You can visit by 'clicking' on the picture collage of musical instruments under the right side of my tool bar).  

My new scanner is set up, so I can start preparing the blocks for 'digital download,' which will make them more easily available internationally.  The scanner will also help me finish the setting/border/finishing pattern for the 16-block quilt!

And then there is still a bit more hand quilting to do on the actual music quilt...never a dull moment around here!

In stitches,
Teresa  :o)
  

Friday, August 2, 2013

Thoughts for Friday...


I've been humming the theme song to the movie "Deliverance" all week...go figure...

I'm not sure this is the final draft for the banjo...I need to sleep on it (just like this ol' hound dog...zzzzz).  I'm trying to finalize the Baltimore Rhapsody blocks for the banjo, guitar, mandolin, and dulcimer.  

I want to do kudzu vine for one of them, since it grows all over the south (and the vine has the prettiest, most unusual flower).  I'm not so sure that kudzu fits the Baltimore album style mold, though...or a hound dog, for that matter...


In stitches,
Teresa  :o)

Wednesday, July 31, 2013

Embarrassing musical moments and the winners!


Thanks for playing along with telling your embarrassing music stories...we've ALL got them, even if we play nothing more than the radio.

I thought it wouldn't be fair if I didn't share some of my better bloopers.  I still work part time as a musician, so there are endless opportunities to screw up.
My earliest one happened when I was 6 at my first piano recital.  I was supposed to play a one hand, one finger version of the Christmas carol,  "Good King Wencelas"...memorized.  When it was my turn, I reluctantly walked to the piano, curtsied, sat down, stared at the keys, went completely blank, got up, curtsied, and left the piano.

OK, secondly...when I was a very naive freshman in high school, the first chair trombone player, a senior, was named Sam Bates.  I was very shy.  One day when I walked into the bandroom before class, Sam was sitting with a bunch of the other guys that played in the brass sections.  Sam stopped talking with his friends and said, "hello" to me...I returned the greeting, saying, "Good afternoon, Master Bates."  I was trying to be cute, not vulgar...I had NO IDEA what I had just said.  I don't even think I knew what "masturbate" meant.  The boys thought I was hilarious...I was mortified later when I figured out what I had actually said...


Third...as a naive freshman in the Auburn University Marching Band, we were on our first road trip to an away game (LSU, I think...).  About 30 minutes before we were to arrive at our pre-game practice location, one of the baritone sax players was walking up and down the isle of the bus, offering brownies.  I accepted one, thinking to myself, "those rough guys aren't such big thugs after all..."  Well, 30 minutes later I was stoned out of my mind (first exposure to pot, which was apparently baked into the brownies...).  There I was, stumbling around the 400-person marching formations, trying to perform the marching drills, remember what end of my clarinet to blow, and not fall on my keester.


Number 4...I was so proud my first rehearsal as the principle clarinetist in the Auburn University Symphony Orchestra.  For those of you who don't know, in an orchestra, the clarinet players play two different clarinets, an A clarinet or a Bb clarinet, depending on the key signature/arrangement.  Because attaching the reed to the mouthpiece can be so fussy, we often just take the mouthpiece/barrel joint off and put it on the other instrument.  The A clarinet is almost identical...just a tiny tad longer than the Bb horn

Well, sometimes you have to make this change quickly between songs, sometimes quickly between movements or within the same movement if there's a weird key change.  I got all confused in one rehearsal with a ridiculously good-looking visiting conductor and I started playing a solo section on the wrong horn, which sounded AWFUL!  It took me a little while to figure it out...I just thought I was horribly out of tune.  I kept trying to adjust.  I'm SO glad it wasn't during a concert.


Number Five...sometimes when I play hymns in church, I start daydreaming and either stop one verse too soon, or keep playing when everyone else is finished.  But that's NOTHIN'!  

One time when I was singing a solo and accompanying myself on the piano, I forgot to turn the boom mic that was right in front of me to the "on" position before I started.  I didn't want to quit and start over...I thought that if I just got to the end of a phrase, I could just quickly turn it on and keep going (hoping no one would notice that I had screwed up).  Well, I tried to do it too fast, and I ended up knocking the whole mic and mic stand over, which hit the piano and then the floor with a HUGE, OVERLY-AMPLIFIED double thump.


OK...enough humble pie.  Let's announce the 3 winners who each get to pick 4 of my music block patterns!


My daughter helped me get the names in a Bundt pan and she picked the 3 winners.


The winners are:

1)  Kathleen C
2)  Regan
3)  Frog Quilter

Congratulations to the winners!

Thank you to everyone for playing along!

In stitches,
Teresa  :o)

Monday, July 29, 2013

The OPENING, a NEW PROJECT, and a GIVE AWAY...


We are celebrating this morning in the quilt cave!

FIRST, our little online store front is finally open to sell the musical instrument quilt blocks that make up the "BALTIMORE RHAPSODY" project!  You can find it by clicking on the "badge" to the right of the top of this post (www.fabrictherapyonline.com).


SECOND, I've been working on some NEW applique doodles in anticipation of our 20th wedding anniversary later this fall.  Last week we celebrated the 23rd anniversary of the "day we met" (does anyone out there celebrate those kinds of milestones, or are we just hopeless, goofy romantics??).  It prompted some little doodles...

After my creative journey through the Civil War Bride Quilt project, I've always wanted to explore a project that depicted our journey, a quilt that would tell our story.  

Lately, I've been studying and thinking about the "The Reconciliation Quilt."  Have you seen this old beauty?


Apparently it was just on display earlier this summer at the Homestead National Monument of America in Nebraska.  The quilt was made in 1867 by Lucinda Ward Honstain of Brooklyn, New York. It was made right after the civil war and depicts 40 scenes of hope and compassion that depict the country trying to reunite and heal.

I love quilts that tell a story, and the folk art style of quilting has always appealed to me...a style where applique pictures can be a little less precise, and size and scale can be distorted, unreal, and a little whimsical.

With that in mind, while I was recently out of state, I started doodling.  I was trapped away from home and quilt cave, with few quilting comforts...just a little sketch book...


I started thinking about the life changing events of all our lives and things we value above all else.  At the time, these events have perhaps seemed small and unremarkable, but after the passage of some time they prove monumental.  Those are the kinds of things I want to capture and record in quilt blocks, if possible, and make my own story quilt...and maybe prompt you to do the same...


When I look at The Reconciliation Quilt," I find that I wish I knew what Lucinda was thinking as she drafted each block.  I wish I had a name, or a date, or some tiny clues.  That is why I am toying with whether to include tiny appliqued letters and numbers depicting names, dates, or places.  Will they add?  Will they detract?  


I think I will prep all the applique shapes and place them on the background first before adding letters and numbers.  I am aiming for 10-inch finished blocks, so I dare not make the numbers and letters much smaller...but I don't want things too cluttered.


THIRD, a give-away to celebrate the release of the patterns!  How about 3 winners, each getting to choose 4 music blocks?  Leave a comment revealing your most embarrassing musical moment EVER (musician, or not...if you have one) and I will choose 3 winners by random number generation at 6PM EST Wednesday evening, July 31.  

In stitches,
Teresa   :o)

p.s. - Our little store site is very simple.  Right now we can only mail domestically.  Soon I will have the patterns available to be purchased by "electronic download" (the large format applique picture will be "quartered" so that it will print on four 8.5 x 11 pieces of paper, then can be taped together).  This will eliminate postage for those interested and able to print a pattern at home/work from email, and ESPECIALLY will avoid all the annoying customs requirements that seem to be different for every country...my head is still spinning from THAT little discovery!  We are definitely learning to walk before running with this project.

Saturday, July 20, 2013

 Well, the "Baltimore Rhapsody" music blocks will be available in 10 days on our new little website.  If you go there before Monday, July 29, you will see Weasley watching over things until we get back in town (we are taking care of some family matters...).

Penny emailed and asked if I would lump all the blocks together in one post so she wouldn't have to go searching through my blog to find them.  The brasses are shown above and the woodwinds below...thanks for the suggestion, Penny!

I wish I could say that I will be quilting on the symphony quilt where I am going, but it is a little risky to take a basically white quilt into that environment.  We will be pretty busy while away anyway.

Here's the string section...
Next, the conductor, percussion, and the solo instruments...
And the first three "general" music blocks...
I like the way the sections look together in 4-block arrangements...hmmm...future projects...


I mailed "Folk Art in the Vineyard" off this week to Paducah for the August Grand Rapids show...anyone out there going on Friday, August 16?  It's so hard leaving the box at the post office and trusting a quilt to go out into the ether.


It only took as entire lint roller brush to get the cat hair, etc. off the quilt before sealing he box.  Zeesh!  My cat follows me everywhere I go, and now, this time, he is preceding me.

Last year there were 80 vendors for the first year of the AQS Grand Rapids show...I heard a rumor that there will be 200 there next month.  (Note to self: must leave credit card at home...)

On the Monday the store site opens, I will be hosting a give-away here at the blog...come back and help me celebrate!  Maybe by then, I can show you what I am doing with the next 2 instrument blocks...the banjo and the accoustic guitar.  Yee-haw!  (or maybe more appropriately, "Hee-Haw"!)

In stitches,
Teresa  :o)