Saturday, November 15, 2014

A tutorial on using PATTERN WEIGHTS in hand applique...


These are pattern weights.  After my last post, I got several emails asking about what they were, so I thought that I would do a detailed tutorial about them.  (For some of you, this may be like watching paint dry...sorry!)

Originally, pattern weights were made to weight down...(wait for it)...PATTERNS!  This picture is from Jess at the "Craftiness is Not Optional" blog, where she has a nice tutorial about making your own weights from washers.  I have to admit, I hate pinning those tissue patterns...I wish I had known about pattern weights years ago.


ribbon and washer fabric weights tutorial

These, below, are made by Dritz, and I just found some like these this weekend at JoAnn's that will be in give-aways when I reveal my Quiltmaker block this week.  Stay tuned!

These are of bean bag construction, filled with heavy metal shot, I think.  They are too heavy and dense to be rice or beans.


I have some pieces prepped to make a rose to demonstrate one of the ways I use the weights.  The rose will be a single unit in a larger block, so I will be working directly over the pattern instead of attaching the unit to a background fabric...attachment to the background fabric will come later.  By working over the pattern, I don't have to worry about a light box at this time, and I like the accuracy.

The edges without the dashes have been glued under.  My pattern pieces are numbered randomly...the numbers have nothing to do with the order of construction.  I will leave the freezer paper on this time when building this unit.  You can leave the paper on all the time, if you like.


If you are worried about getting glue on your pattern, you can place a piece of plastic or tracing paper between the pattern and your work.  I work right on my pattern because I use TINY drops of glue to baste the pieces together.  If I get glue on my pattern, I know I am using too much glue!


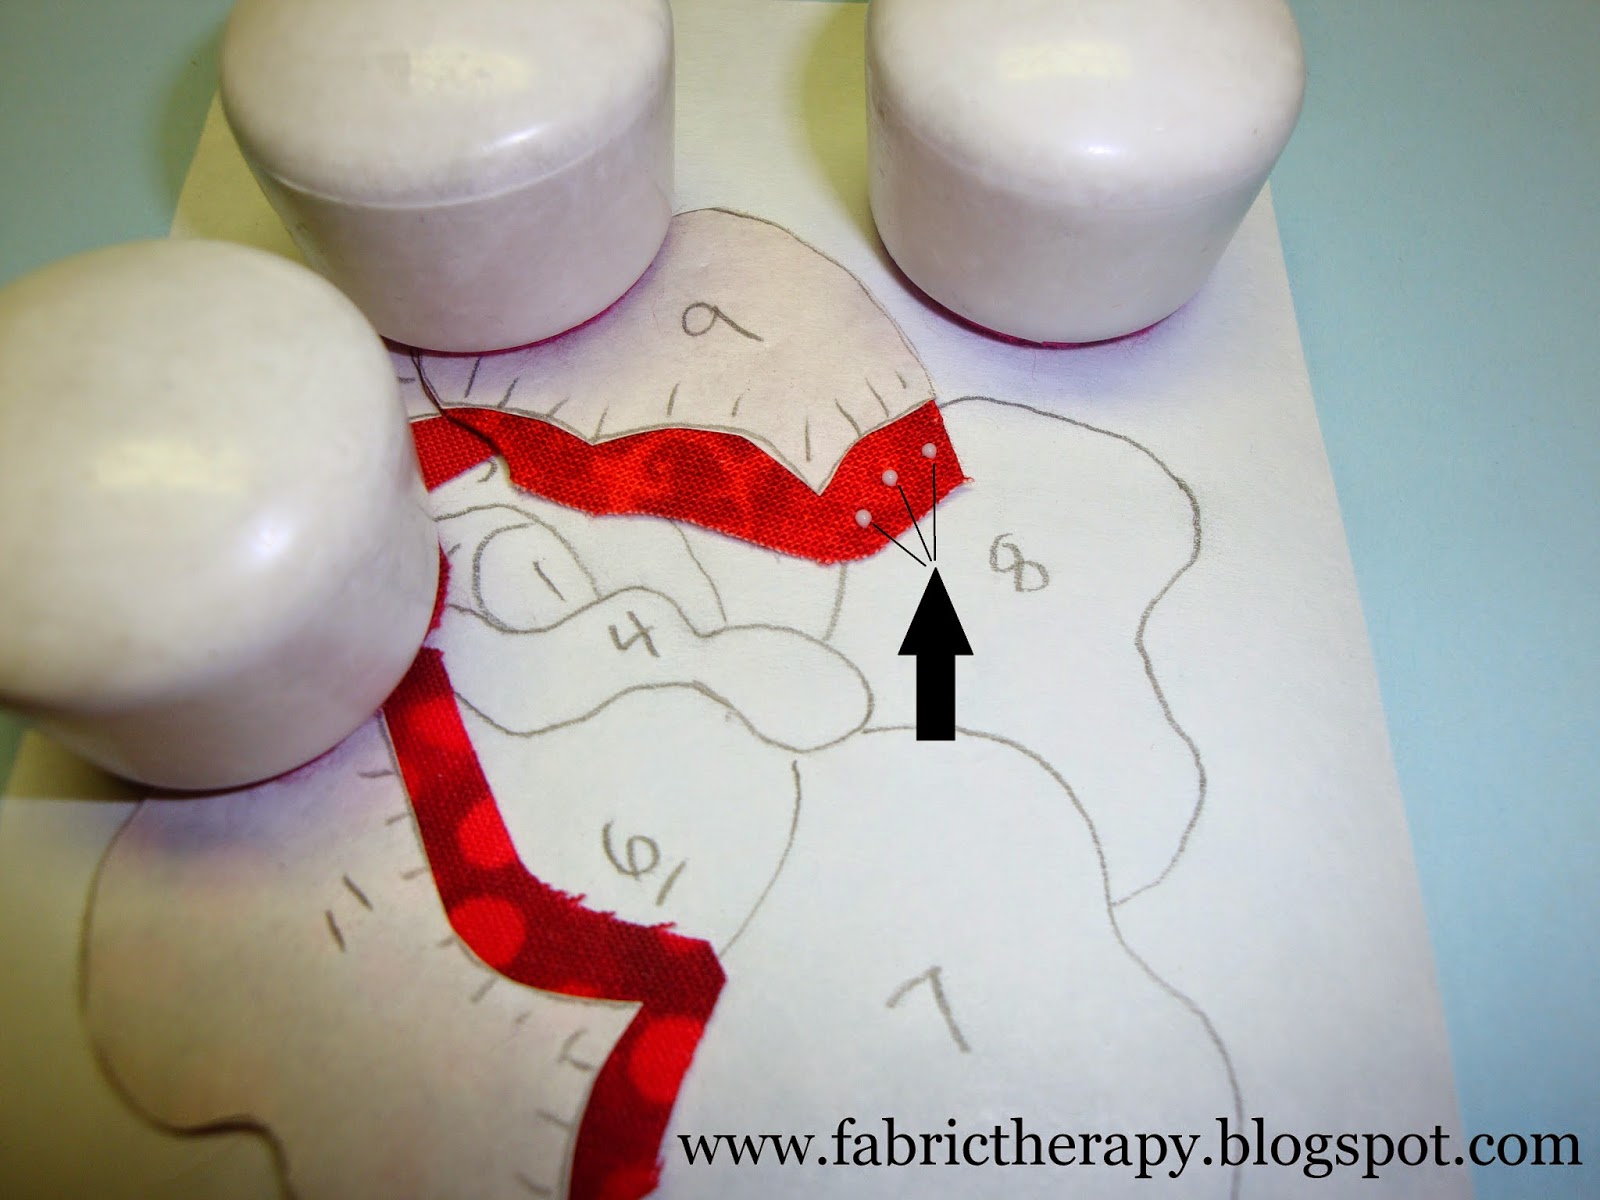
My freezer paper pattern is pressed to the RIGHT side of the fabric. Every edge that is tucked under another piece has dash marks on the edges that are tucked under.  That way I remember to leave about a 1/4 inch allowance on these dashed edges when cutting instead of the usual 1/8 inch I use on the other, undashed, outer edges.


For this rose, I will make the center part, then set that aside while working on the outer petals.  I use the edge of a weight to hold my initial piece still and stable.  The black arrow tips show my perfect alignment (if I were to pull up the edges of the fabric, you would see that my pattern is placed perfectly over the drawing).


I used TINY drops of glue baste near the outer edge of the allowance, but away from where I will be stitching later (the glue flattens and I don't want to stitch through it, but I also don't glue too close to the edge because that would make my pattern messy). 

Remember "DOT-DOT-NOT-A-LOT" when glue basting (thank you, Ola).


I use my beading tweezers (or long tweezers) to move these pieces around instead of my fingertips.  I fit the yellow piece into place. Yes, the yellow piece is small, but I only had to glue one curvy edge under, which makes it a little bigger to handle.

The tweezers make picking things up infinitely easier.  Trust me, I am a complete idiot with chop sticks, but I LOVE my tweezers.


When I pull up the edges of the fabric to check my alignment (at the black arrow tips), I am right where I need to be.


More TINY glue dots in anticipation of the next piece...


My patterns not only line up with the master pattern underneath, but also with the other adjoining pieces (see black arrow tips).


More TINY glue drops...


Another piece lifted into place by the tweezers...then I carefully adjust the pattern weight.  It does not take long for the glue to hold enough to continue with the next piece.  As long as I handle things carefully, I don't have to wait for the glue to dry completely to keep working.


Now I just lift this smaller unit to the side while I work on the outer petals. 


I have drawn a yellow line about where the assembled sub-unit will go later...of the remaining petals, petal #10 appears to be the bottom-most petal, so I will start by anchoring that one with weights.


The black arrow tips show where I need to line up my #10 petal with the adjoining petals.


This time I will glue and place two pieces at the same time, petal #9 and petal #11...


Again, I check my alignment at the black arrow tips...


Now I will attach petal #8...


And again, I check my alignment both above and below the pieces on the master pattern...


Now the final outer petal #7 is in place and the weights are placed to hold everything for a couple of minutes.


Two more petals to go, first petal #6...


And now I will glue, getting ready for petal #5...


Again, I check my alignment at the black arrow tips...


Now I can glue my original sub-unit into place...


I applied my pattern weights and went to make a cup of tea...


It's like a jigsaw puzzle!


When the glue has set up a few minutes, I CAREFULLY remove my paper patterns to reuse them...first prying up the edges with my stiletto (awl) and then gently pulling them off with my tweezers, loosening as I go.


Some people use washers...I don't think a single washer is heavy enough.  Most of the tutorials showing how to make weights with washers use 2 or more washers, covered with a yo-yo or wrapped with yarn or ribbon.


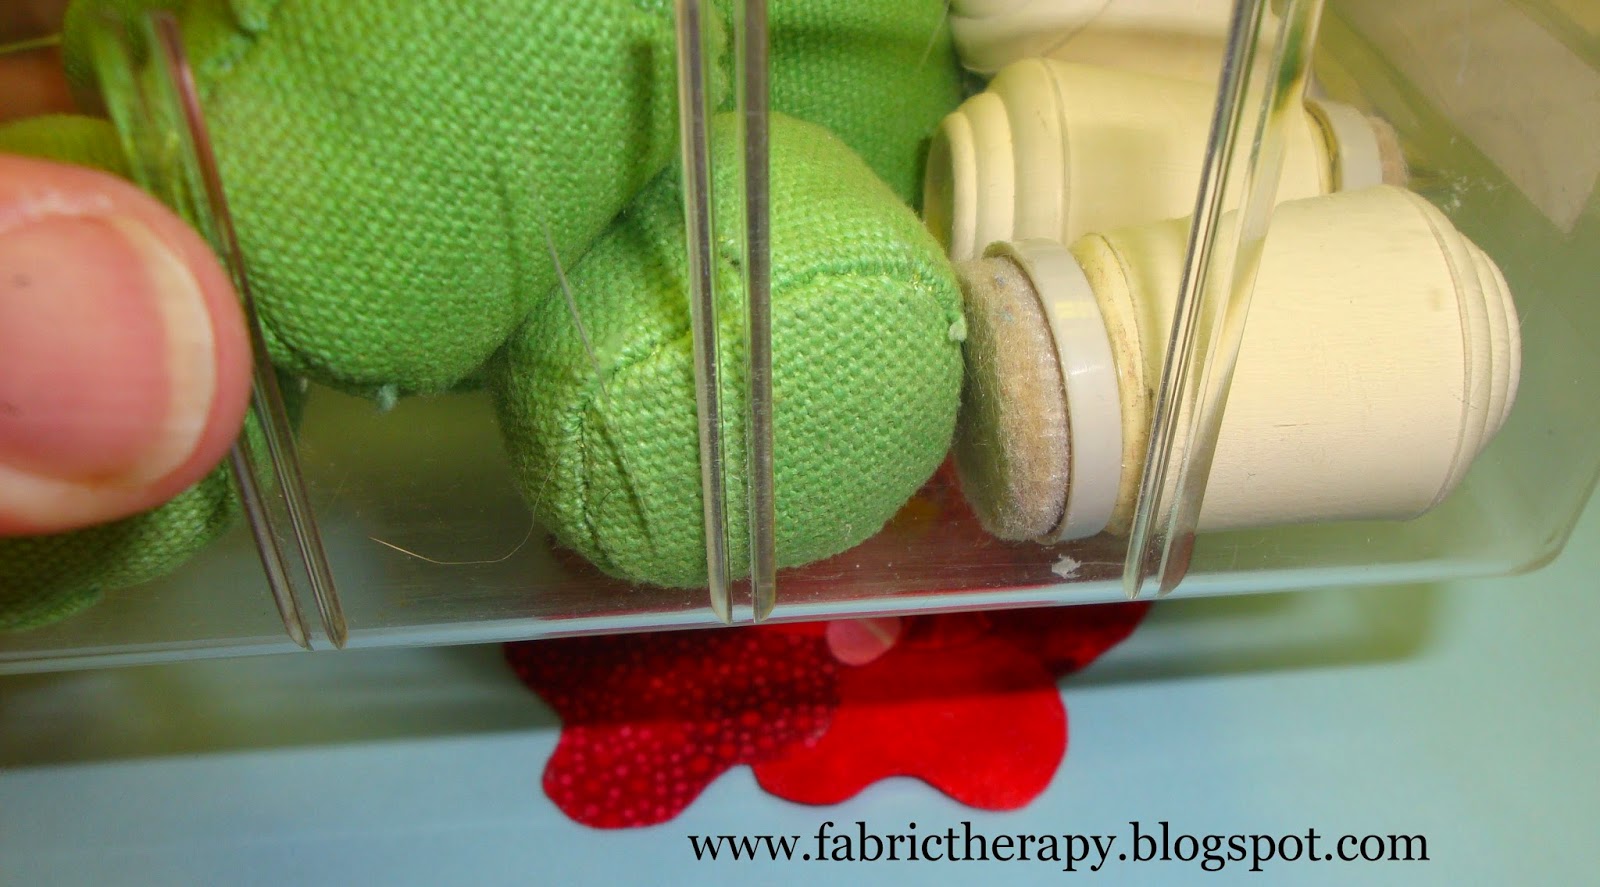
When working with a large unit, I just pile the weights back in their storage drawer and put the whole drawer on top for weight!


Since the finished, prepped rose will be a large applique unit and I will want to trim the background away before hand quilting, I will stitch all the petals together BEFORE glue basting to the background and doing the final perimeter stitching.


I'm pretty sure that this Monday is my day in the week-long Blog Tour for the launch of Quiltmaker's 100 Blocks, Volume 10 (still awaiting my confirmation email).  It should be a FABULOUS week of blog reading and give-aways.  

Check the link above every day to find the list of featured blog links.  I will have fresh give-aways on my day (and announce my pre-mature give-away winners from last Monday - OOPS!) on my day on the tour.

It should be a good time for everyone!

In stitches,
Teresa  :o)

Wednesday, November 12, 2014

New borders for an old project...


I've been trying to force myself to design outer borders for my "Belles and Blossoms" quilt.  The part of the top that is finished has been one of the projects holding my design wall hostage for the last 6-8 months.  

Lately, my design wall has been part of my UFO storage system, which really defeats the purpose of a design wall, doesn't it??   :o)


I've got the right side border prepped, but I am not sure how I feel about it yet...


I assembled what units I could on the paper pattern first before transferring them to fabric.


I still may add some sort of ribbon effect between the blossoms...I definitely don't think my mojo is back...this little bit of nonsense did not come easy, and I'm not sure I am crazy about it yet.


I will add a colorful 1-inch stop border before adding this larger outer border.


So, if you were blog reading early last Monday morning and saw a huge post on my blog which later disappeared, you are not nuts. As part of the Quiltmaker launch of their new 100 Blocks edition, I am part of the blog tour they are sponsoring for block participants. Originally it was scheduled to be this week.  That was way back in March 2014.

So I worked hard to get mine ready to publish after midnight last Sunday night, only to find that I was early and that I needed to take the post down until next Monday, November 17.  How embarrassing!

I am the nutty one thinking I am ready to be back in "prime time," so to speak, after my parents' fatal accident of last May.  I still don't think I am functioning correctly, certainly not feeling very creative, and it is driving my perfectionism streak  CRAZY!!

So bear with me, good friends.  If I scrutinize how I feel day to day, nothing seems to be any better, but perhaps I feel better than I did last month, and that is a good thing.

So...tune in NEXT Monday for the big reveal, version 2.0!


And check out Quiltmaker's blog Monday through Friday of next week, November 17-21, for the big Blog Tour with helpful tutorials for many of the blocks that will be in the new magazine! (not to mention, lots of give aways!)


For those folks who left comments on that first post (that was later yanked)...I will still do the give-away of the magazines to you select few who commented so quickly (call it an "early bird special").   There will be more give-aways next Monday, so don't the rest of you worry about that!   :o)

In stitches,
Teresa   :o)

Monday, November 10, 2014

The launch is coming!


The moment I have been waiting for has almost arrived...my block will be appearing in the new Quiltmaker's 100 Blocks, Volume 10 next week.

There will be an associated week long Blog Tour to celebrate the launch, and I think my day is Monday, November 17.


I hope you will join us all next week to celebrate the launch!

In stitches,
Teresa   :o)

Wednesday, October 29, 2014

One person's fabric therapy is another person's insanity...


I had an epiphany over the weekend...tiny, fiddly, insane piecing is NOT my strong suit, although crazily KEEPING tiny pieces of fabric for later projects IS my strong suit.  How crazy is that?


I have been sorting through my reproduction scraps for tiny bits and strips to make into blocks for my attempt at Sue Garman's properly named "Ohmigosh!" quilt.  The smallest pieces are 1/2 inch finished.

Sue Garman scrap quilt - Omigosh - 1/2" finished squares make up the nine patch units.

I have been watching others work on this project out in the blogosphere...some at an amazing speed...and my hat is OFF to you!


I finally decided I needed to stop and put one of the two block types in this quilt together to see if I have the right stuff to make this.  OMG...those four patches are tiny!  And the nine patches? Wow!!!


That shoo fly block will finish at 4-1/2 inches...SERIOUSLY, Ohmigosh!

I find myself cutting up every repro scrap...even this cheater cloth...to find tiny bits and pieces to use in this scrappy quilt.


I am SOOO much more comfortable with teeny, tiny APPLIQUE pieces, which I know most of YOU find insane!


Clearly, one person's fabric therapy is another person's insanity...and vice versa!


I will not give up on "Ohmigosh," but I am definitely more comfortable...and faster...with the fiddly hand applique!  I so admire my friends who can just whip out the intricately machine-pieced tops.  But for me, it is like trying to speak another language that I am not that comfortable in speaking!

In stitches,
Teresa   :o)

Thursday, October 23, 2014

Something else checked off the "family" insanity list...

So proud of my high school senior, Riley!  Big IB research paper due today and she made it!

"Just keep swimming...,"
Teresa  :o)


Thursday, October 16, 2014

Going nuts and squirreling away nuts...


Oh, the fluff has been flying in the quilt cave lately!  LOTS of playing with scraps and scrap management...I feel like the scraps have been taking control of the cave!


I have my reproduction scraps segregated into bins, and I can't close them any more!  I considered throwing some out, but couldn't bring myself to do it...the scraps are so beautiful.  Guess I need to start chain piecing something...


So I have been cutting one inch strips from whatever size chunk I pull out of the bins in neutral and medium-dark prints.  I match them up in length, one neutral and one print, and chain piece them together.  

Some I leave as just two strips sewn together, one neutral and one darker print.  With others, I add an additional neutral strip or darker print.  I press all seams toward the darker fabric.


Then I slice those multi-length strip sets into one inch little strips and make either tiny nine-patches or tiny four-patches.

These nine-patches will finish 1.5 inches square and the four-patches will finish 1 inch square...see?  That's where the "going nuts" part comes from...fabric therapy!


Here are some of my scrappy strip sets awaiting slicing...


I started with scraps from THIS container...


...and I cut my one inch strips and actually put scraps too narrow or too short in THIS container (NO IDEA what I will do with THOSE).


So, where is all the insanity leading?  I am going to start working toward making Sue Garman's "Ohmigosh!" quilt.  You can find the pattern here on her web site.

Here is Tazzie's version that she just finished...it is getting quilted now (you can see her blog here).  She pieced hers in a matter of weeks...unbelievable!


Here is another version that Sue Garman shared on her blog made by her friend Marsha.  She incorporated applique baskets blocks into the pattern...hmmm...


Here is Sue Garman's original version...


And now for the other nuts...the ones I am "squirreling away." Even though family matters around my parents' estate are still being ironed out, it is becoming more and more clear that we will be moving south from SE Michigan to NW Alabama next summer.

The monumental task of moving the quilt cave is beginning to dawn on me (kind of like a ton of bricks falling on my head).  We have been in this house for 20 years and my stash was so much smaller in 1995.  (Along with my quilting circle of friends, which will be the hardest thing to move away from...)

There will still be a quilt cave, but I need to go through EVERYTHING and only take what I will really use (which will still be too much).  Our fabric tastes change over time, so some fabric will be bagged and tagged and sold at a "quilter's garage sale" in the spring with my two buddies, Ola and Mary.  They are also paring down their stashes to make things more manageable. This will be the "2nd Annual Quilter/Crafter's Garage Sale" as the three of us did this last fall...much to the delight of local quilters!  

It was hard whittling down the stash last year, but now I've got to be brutal and serious.  I've started the process and have been stashing bags of "bagged nuts" in the attic, using quart, gallon and 2-gallon Ziploc bags.


At some point I will re-adjust my remaining bins to use some of the empty bins I am producing...that way what is left won't be bursting out of their bins and will have a little more breathing space.


I meant to post this last Monday so that I could tag Jill of the Happy To Sew blog.  She continued the "Around the World Blog Tour," and you can click on the link to check it out!  She directs you where to go next Monday to check out the blogs she tagged.  

This has been such a fun blog tour!  I had a 48-hour stomach bug at the beginning of the week and was beginning to think "ebola."  I feel MUCH better now!

Anyone else out there wanting to take on the "Ohmigosh" quilt? We could work on it together!

In stitches,
Teresa   :o)