Sunday, January 27, 2013

Rejection, squaring up blocks, and the "big picture"...


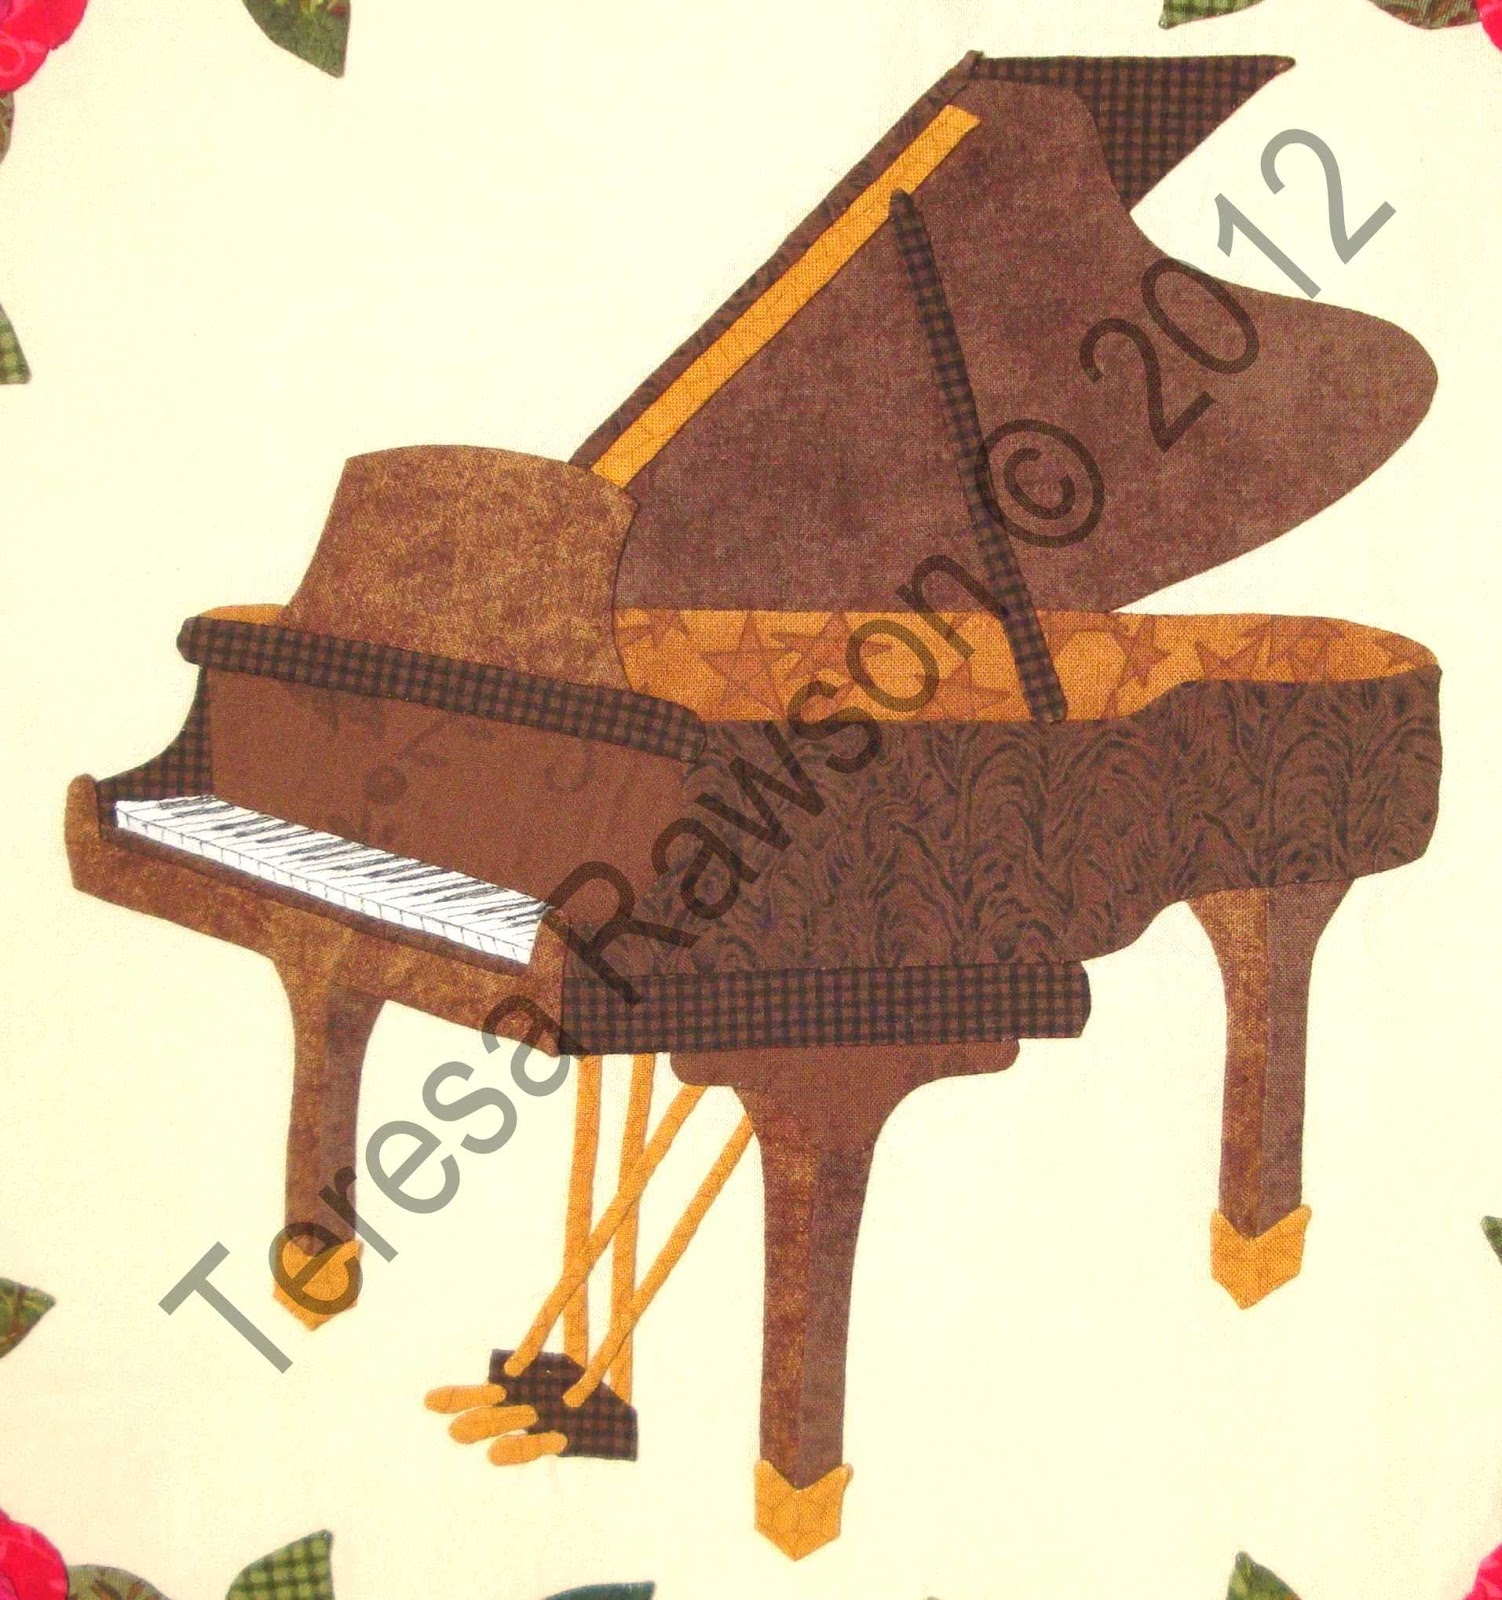
Well, I always knew that I couldn't put every music block in the first quilt of this Baltimore Rhapsody project, but I am disappointed to exclude these three from my first quilt.  When I first envisioned the "symphony" quilt, I was going to put the viola in the same block as the violin, one on each side of the fruit compote, etc.  I was also not going to include the piano or timpani. 

Then, there is the last block I am working on right now...how could I not include it (as soon as I finish it, I will post it - it is so FUN!).

Now I see these three with a fourth block (doodled in my noodle...).  Then they will make a nice wall hanging.

I couldn't wait to finish the current block to square them up and start messing around with the arrangement of the sixteen blocks.  So now that I finished all the embroidery, it's time to trim and have a partial reveal.

When it all boils down, I mostly wanted to see the monster all together.


The ruler on the right has been very useful on this project.  It is made by Omnigrid and measures 15 inches square.  The Creative Grids ruler on the left is new and was especially designed to square up this size block.  It measures 15-1/2 inches square...PERFECT!


The blocks have had a final pressing, and I carefully, carefully trimmed away the excess background.  "Measure twice, cut once" is certainly appropriate in this case.


The new ruler made quick work, and I have a pile of blocks ready to be pinned to my design wall.


My strategy consists of arranging the blocks, considering color, which way the block "leans," and spreading out the various degrees of heaviness. THEN I STAND BACK AND SQUINT.  The squinting is key for me. 


Every time I moved blocks around, I took a picture so that I could reproduce that arrangement, if needed.


For the next picture, I inserted my unfinished block...mostly to get rid of the hideously ugly and old pink college blanket that is used for the design wall in the quilt cave.


I'm sure I will move them around some more.  I am making various sashing and border pieces, so it was time to have the blocks up on the wall so I could audition sashing strips and fabrics where I can see the whole thing.

The quilt is not this dark...my indoor photography needs a lot of help, mostly a better camera, I think.  It is really gratifying to see them all (mostly) and continue the planning.

In stitches,
Teresa  :o)

p.s.  I was openly WEEPING tonight after Downton Abbey, Season 3, Episode 4.  Spoiler alert: someone dies.  OMG!  I AM STILL CRYING...

Saturday, January 26, 2013

"Baltimore Rhapsody" - the final block tweaking...

Before tweaking...

More tweaking...I usually don't mind detail work, but even I am ready to MOVE ON and GET ON WITH THINGS.  Before trimming the blocks down, the last outline stitching to highlight all the tedious hand-applique was needed.

Kerry of SimpleBirdApplique was asking about why I do this.  Simply stated, some applique motifs didn't pass the "squint test."  If I put the finished block on my design wall, stand back, squint my eyes, and lose part of the design, that is a signal to me that something must be done.

After tweaking...

After tweaking...

After tweaking...

All of the woodwind blocks have light-colored keys.  When they spill over onto the light background, they simply don't "speak," they melt into the background.  This is especially true with the flute where the keys are basically the same color as the instrument.

Before tweaking...

I even carefully used a different, darker fabric for the body of the flute to emphasize the keys.  Then when I finished, pinned the block to the design wall, stood back and squinted...nothing.  There still was not enough contrast...bummer.

Before tweaking...

After tweaking...

I needed definition, not a cartoon finish, so I used a single strand of DMC embroidery floss in a gray that was darker than the flute.  I do a simple outline stitch with one strand (where the stitches don't overlap, but touch end-to-end.  Using black would have maybe looked comical.
After tweaking...

After tweaking...

 The outline stitching even helps some of the flower pieces.

After tweaking...

Before tweaking...

Even on the clarinet and oboe blocks, where the body of the instrument is black, the lighter, metal keys just look like a mash of gray.

Before tweaking...

Before tweaking...

I outlined the keys in black only where the keys overlap...I did not stitch where the gray met black...the black fabric provided the needed contrast. 

After tweaking...

I did choose black floss for the clarinet and oboe keys...for some reason it didn't seem so cartoon-ish on these instruments.

Before tweaking...

After tweaking...

On the piano block, I painstakingly drew a multi-petaled blossom, picked out a graded selection of reds for the petal pieces, and after all this STILL ended up with a flower that looked like it was made from one fabric when I did the squint test.  Ouch!

Before tweaking...

And on the piano legs, I carefully chose two different brown fabrics to depict the different edges and highlight the perspective.  When I squinted, the legs looked like they were made from the same fabric.

Before tweaking...

Just a little outline stitching using a slightly darker red floss helped tremendously...

After tweaking...

 ...and a little dark brown stitching helped to define the piano legs.

After tweaking...

I had already outlined where "parts" met "parts" on the trumpet, which helped, but then I lost the whole trumpet on the background.

Before tweaking...

After tweaking...

(Can you tell I pinned the block to a black background for the photo?  You can see where I trimmed away behind the trumpet bell. That won't be so obvious when the block is against a light colored batting/backing.)

I went back and outlined the rest of the instrument with the same medium brown and I like the result.
After tweaking...

The viola pears before...there's a pattern here...can you see it?  Maybe this is why people don't use much bright yellow in applique. It is perfect on a dark background, but is totally lost in the cream.

Before tweaking...

After tweaking...

Just a little dark gold helped so much.

I had already outlined all the petals on the double bass block daffodils to help emphasize the blossom details (and the fact that I had used so many fabrics)... 

Before tweaking...

...but the light green stems disappeared when squinting.

After tweaking...
 Same thing with the bottom of the lime...

After tweaking...

And the double bass needed the same definition between the top of the instrument and the side as the three smaller stringed instruments.

After tweaking...

And FINALLY, squinting at the cello block revealed an empty space that would draw the eye in the final quilt (when all the text wouldn't be showing, LOL).

Before fixing...

I decided that I needed to add a huge, mutant butterfly.  I was already making slightly smaller mutant butterflies for the timpani block.


The block still looks a little empty, but it is better.


Picky, picky, picky...but I would stare at the finished quilt and head-slap myself if I had not taken the time.

Head-slapping hurts and should be avoided at all costs.

In stitches,
Teresa   :o)

Wednesday, January 23, 2013

"Baltimore Rhapsody" Block #18 - the harp...


The harp is the next orchestral instrument in my "Baltimore Rhapsody" quilt (click here to find out more about the project).  It is one of the most ancient stringed instruments - pictures on vases show that it was used in the ancient courts of Babylon four to five thousand years ago. 

There is a harp in the New York City Metropolitan Museum of Art that is over 2500 years old.  It was found in an Egyptian tomb and looks as though it could still be played.


Harps were used in both Ancient Greece and Rome.  In Ireland and Wales, it is the national instrument.  A well-tuned harp was one of the three necessities for a Welshman in his home (the other two things were a virtuous wife and a cushion for the best chair).
  

The beautiful, unusual shape of the instrument is due to having to accommodate strings of different lengths.  The most primitive harp would be several strings tied to a hunting bow. 

As the harp got bigger, the strings were attached to two separate pieces of wood, with the lower piece also serving as a sounding board to amplify the sound.  A third piece of wood, the pillar, connects the other two.  In the modern harp, the pillar serves as a sort of pipe that connects the pedals at the base to the mechanism that changes the length of the strings, thus changing the pitch of the strings.


Until 1810, harps had no way to change the pitch of a string, so they could only play music in one key,  With the modern pedals, a harpist can play just about anything.


The person playing the harp tilts the instrument until it rests on the right shoulder.  The strings are played with both hands (one on each side of the strings) and eight fingers/thumbs (the pinkie fingers aren't used).


The modern harp has 47 strings and seven pedals.  The strings are colored so that the harpist can orient themselves - all the C strings are red, all the F strings are blue.  With the pedals, the strings can be set to play either chords or scales.

Notes are played in rapid succession (a glissando) where the strings vibrate until dampened or plucked to produce short notes/chords.


The harp can accompany other instruments, be featured as a solo instrument, or add beautiful flourishes to orchestral music.  As a piano player, I have always wanted to try and play the harp - I think it has the most beautiful sound.

In stitches,
Teresa  :o)

Sunday, January 20, 2013

Fine-tuning the string section...

As I am getting closer to putting the "Baltimore Rhapsody: Symphony" quilt top together, I am starting to trim down the blocks to their final unfinished size, 15-1/2 inches.

Before doing this, I want to be completely through with any stitching or embroidery so that I wouldn't be handling the blocks too much before seaming in all the raw edges (I hate all the messy strings when blocks start to unravel from being handled too much).

I looked at them with a much more critical eye than when I first finished them.  I saw some things that needed to be tweaked or fine tuned...some more outline embroidery, a French knot here or there, a few more "safety" applique stitches on pointy pieces.

First I tuned up the string section.  Here are some before and after pictures so you can see the difference.  Some of you may think I am being fussy, but after all the work that has gone into this project, I want it to be as  good as it can be.

Violin before fine-tuning...

Violin after fine-tuning...

I had used a slightly darker fabric for the side of the violin to help with the perspective, but it needed a little darker outline stitching to look right.

I went back and added this to all stringed instruments.

Cello before fine-tuning...

Cello after fine-tuning...

I also added some outline stitching to the lighter fruits of the violin block where there wasn't enough contrast between the pear fabrics and the background fabric.


Pears before fine-tuning...

Pears after fine-tuning...

It is a subtle change, but I like the result.  I also made similar adjustments on the viola and double bass blocks.

Now the string blocks are all tuned up and ready to be trimmed!

In stitches,
Teresa   :o)