

My friend Mary Liz turned me onto Jeana Kimball straw needles for hand applique. They are slender, super sharp, and sturdy (everything I want to be...LOL). I order them from Foxglove Cottage if I cannot find them at my LQS. I like size 10.

Yes, the glue does cause a little needle resistance. I figure it's a trade off...I don't like the constant stuffing under of edges while tryng to take tiny stitches that is involved with the needle turn method, so I put up with a little needle resistance. I like that when I sit down to stitch, I am mostly just stitching. I wear a thimble now, but I have one I love so that is not a hardship. The less glue I use, the easier the sewing. The balance gets better with practice. I'm striving to have as little needle resistance as possible. I had to get past gluing like a pre-schooler (I've seen kids use a whole glue stick on two pieces of paper...zeesh!). I used more glue for this tutorial than I usually do because I wanted the glue to show up for the photo shoot! I'm trying not to depend on seeing the purple color when I prep now. As the glue sticks get older, the purple color is less intense anyway (keep those caps on, even if not "snapped" tight, when not gluing!).

See the little purple handled tool above? If you don't know about these, this will change your appreciation of the needle tip applicator for the Roxanne's. It is a "Lil' Stick" by Fasturn, and you can order a set of 3 of them for $3.50 from P3 Designs. They are great for clearing the tip when it gets clogged! Order a pack and share 2 of them with your friends.
Hopefully your local quilt shop carries Roxanne's glue baste. If not, you can order it from Colonial Needle. It is offered in the big bottles with the needle tip applicator or smaller bottles. I like both, although I think my "dot-dot-not-a-lot" dots are smaller with the needle tip applicator. But the tip on the smaller bottles requires less maintenance.
I like to use YLI silk thread for hand applique. It is very fine...sometimes it feels like I am stitching with human hair, LOL! It may be old fashioned, but I coat my thread with beeswax...it makes it a little better about knotting and protects the thread a bit from the rigors of being repetitively pulled through the fabric layers (thanks Barb of Fun With Barb!). It runs $5.00-5.50 a spool and many LQS carry them. There are other brands of silk...like Clover, but I have not used them.

I used to use cotton thread, which now seems as thick as rope after using the silk. I would dutifully match thread color with every applique piece and it was difficult to make invisible stitches. With silk, I don't have to match colors unless I just want to...usually a range of neutrals will suffice. I do have some colors though...they are like quilter's sugar-free candy!

Silk, being so fine and slippery compared to the fibrous cotton, makes me "knot off" my sewing a little differently when it is time to stop stitching, make a knot and trim the thread. I take an extra stitch or so in place in the backing behind the applique piece before making my knot. After knotting, I take some running stitches in the hidden backing before cutting my thread (sometimes first in one direction and then back in the other). I just want to make sure my stitching doesn't come unraveled over time. It takes no time to take a few extra stitches for peace of mind. I just sort of made this up as I went along - if anyone else has a better suggestion, I'd love to hear it! Here's the back of one of my appliqued baskets.


I generally take extra little stitches on pointy things and in tight turns and corners...just for added security.
After stitching everything down, I am ready to get rid of the glue. The glue stick glue is the easiest to remove, especially once you are comfortable with the technique and are using the minimum amount of glue. The Roxanne's glue baste requires a few minutes of soaking.


...now you don't.

I GENTLY squeeze and release, squeeze and release the pieces while they are in the water to help facilitate glue dispersal. I also change the water a few times to make sure I'm not just taking the concentrated little glue dots and spreading them into a fine glue glaze...LOL.

On bigger globs of glue, sometimes I squeeze and release with my thumbnail right on the glue dot, just to gently target, agitate and facilitate the dissolving of the glue. I usually soak block for a while before helping with my hands! Especially if the Roxanne's has been there a while.
(I usually wait to cut behind the bigger applique pieces until after I have washed the glue out, but this time I trimmed a couple first.)

Once I am satisfied that the glue is mostly gone, I roll the piece up in a clean, dry towel and GENTLY squeeze to remove water. NEVER wring or twist as this would put stress on your applique stitches and cause your block to get out of shape.
Now I spread a towel on my pressing surface, smooth my block with the right side DOWN, and press with a dry iron to dry and re-shape the block.


OK, on with prepping pointy, narrow, skinny, tiny, the weird, and reverse appliqued pieces. I picked an album block for demonstration purposes with rounded pieces intentionally because roundy things are faster and easier, at least to me. I have no problem navigating curves and the tiny pleats necessary to keep things round and smooth.


My camera man went to bed, so you are stuck with a one handed demonstrator and less-than-perfect pictures. Here I tried to show in larger paper what I did with fabric.


Then I miter trimmed the bulk with my scissors...

The point of the heart is done the same way, along with clipping the top cleft.


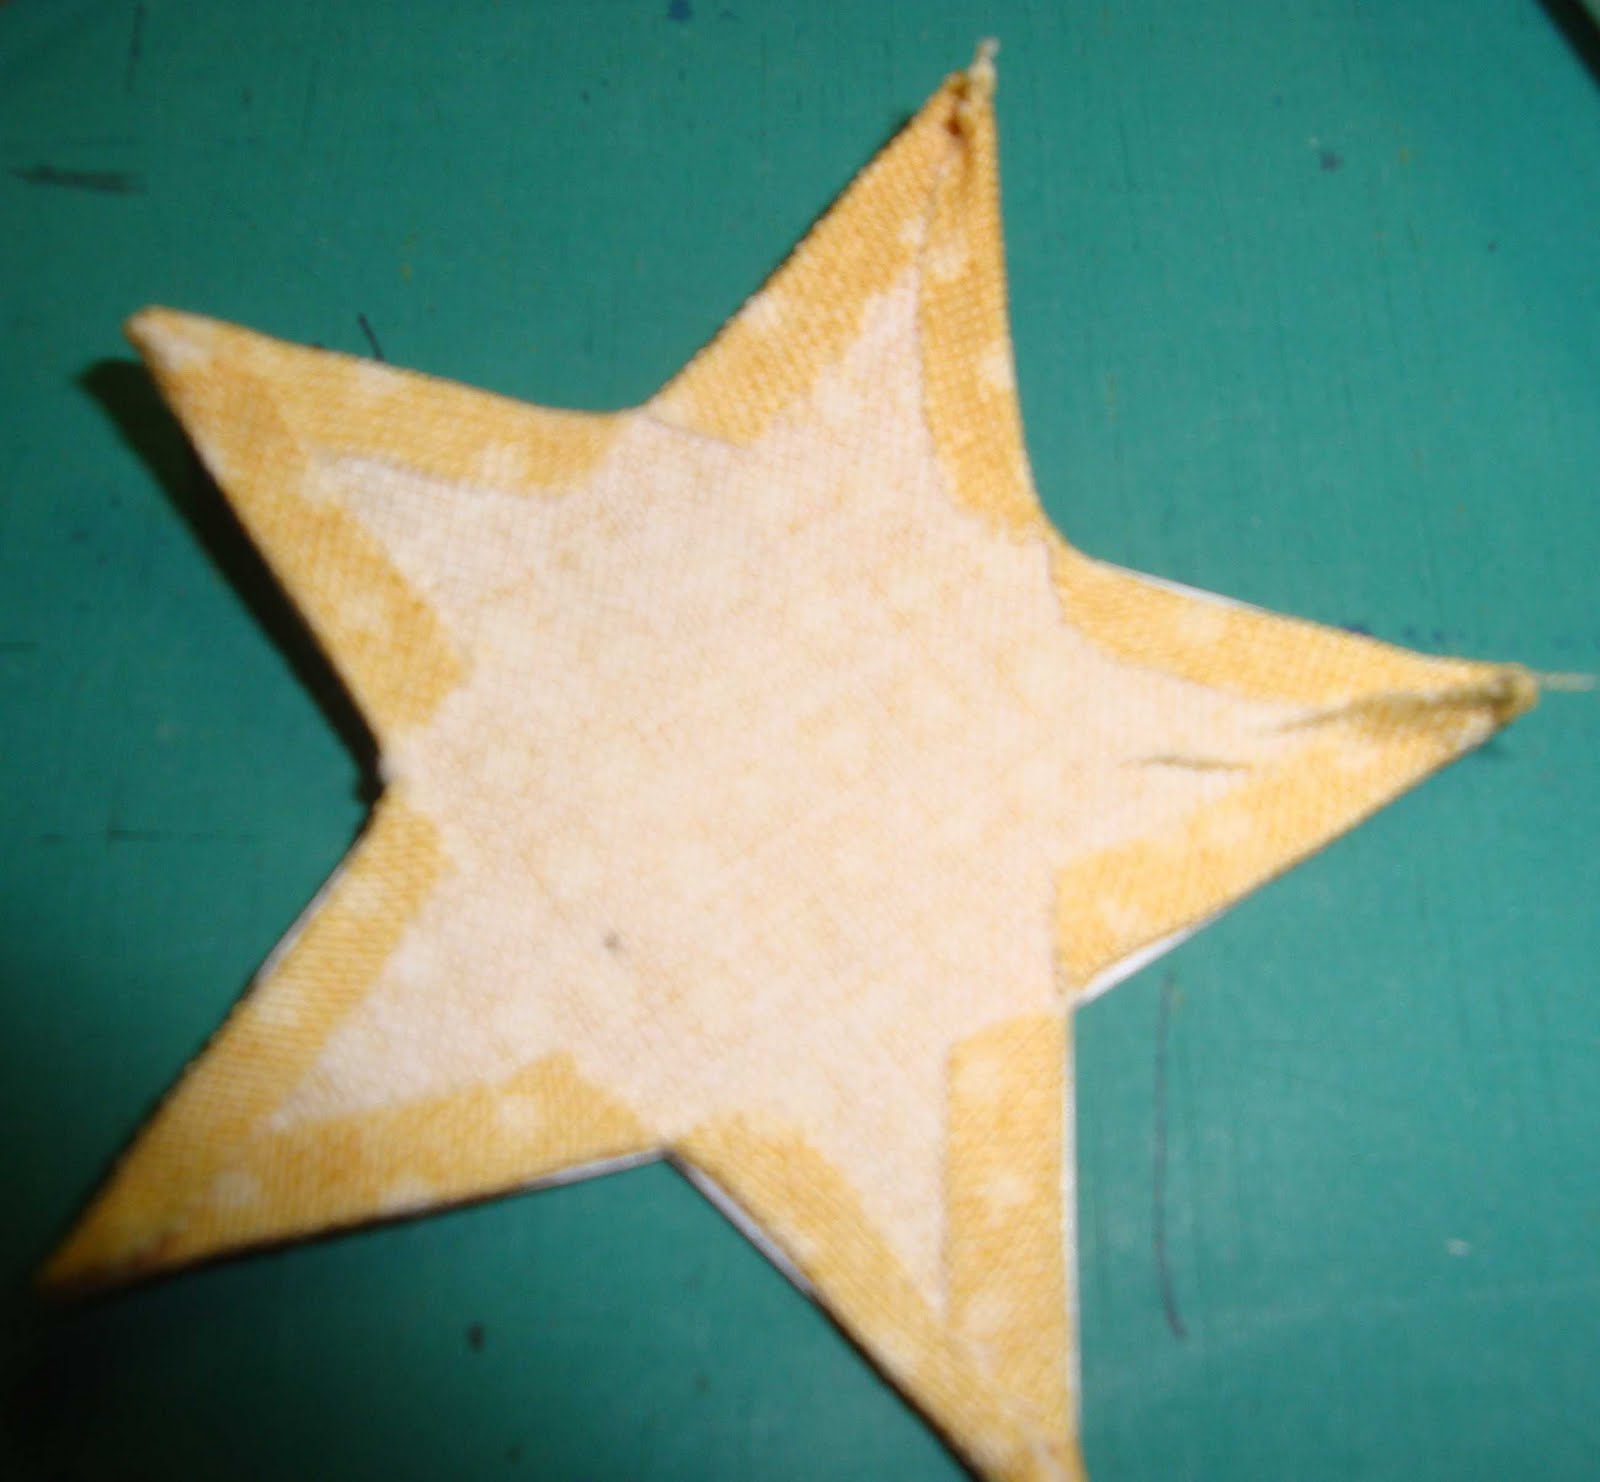
Stars are a little tricky, even the less pointy ones because of the tight curves. I clip twice in each star angle for these folk art stars so I get a smooth inner curve.

I glue from clipped angle to clipped angle and take them one "point" at a time.


For pointy stars, I work from point to clipped angle.


I either carefully trim the bulky excess (away from tip)...


...or I wait and stitch one side of each tip, then (in needle turn fashion), I stuff the bulk under as I stitch down the other side of the point. If I am going to do this, I am careful not to glue the bulk down. I use my thumbnail to pry it loose while my glue is still damp.

It looks a little messy until stitched.


You can see the folded bulk here, hanging down and ready to be stuffed while stitched.

Skinny stems are so easy with this method...


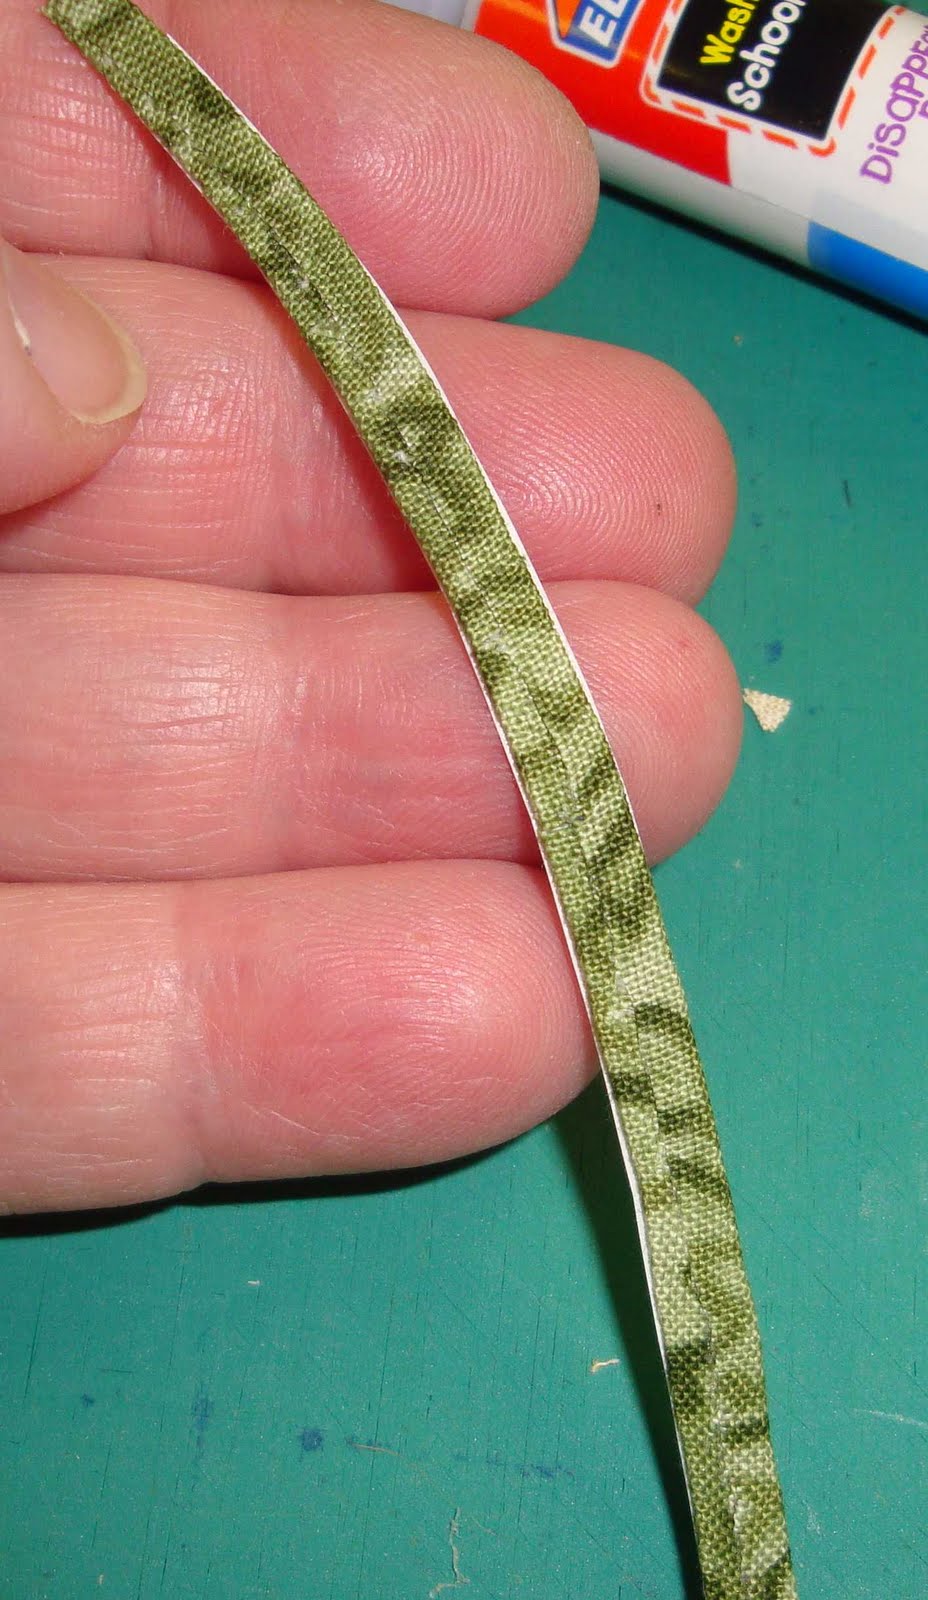
I love skinny stems, especially on small blocks!

I treat square corners either of 2 ways. I either just do side by side, them miter/trim the bulk at the corner...


...or I do the tri-fold thing I do on leave and heart points...

(the tri-folded corner is the bottom right corner below...the upper right corner was done the first way and is waiting to be trimmed)

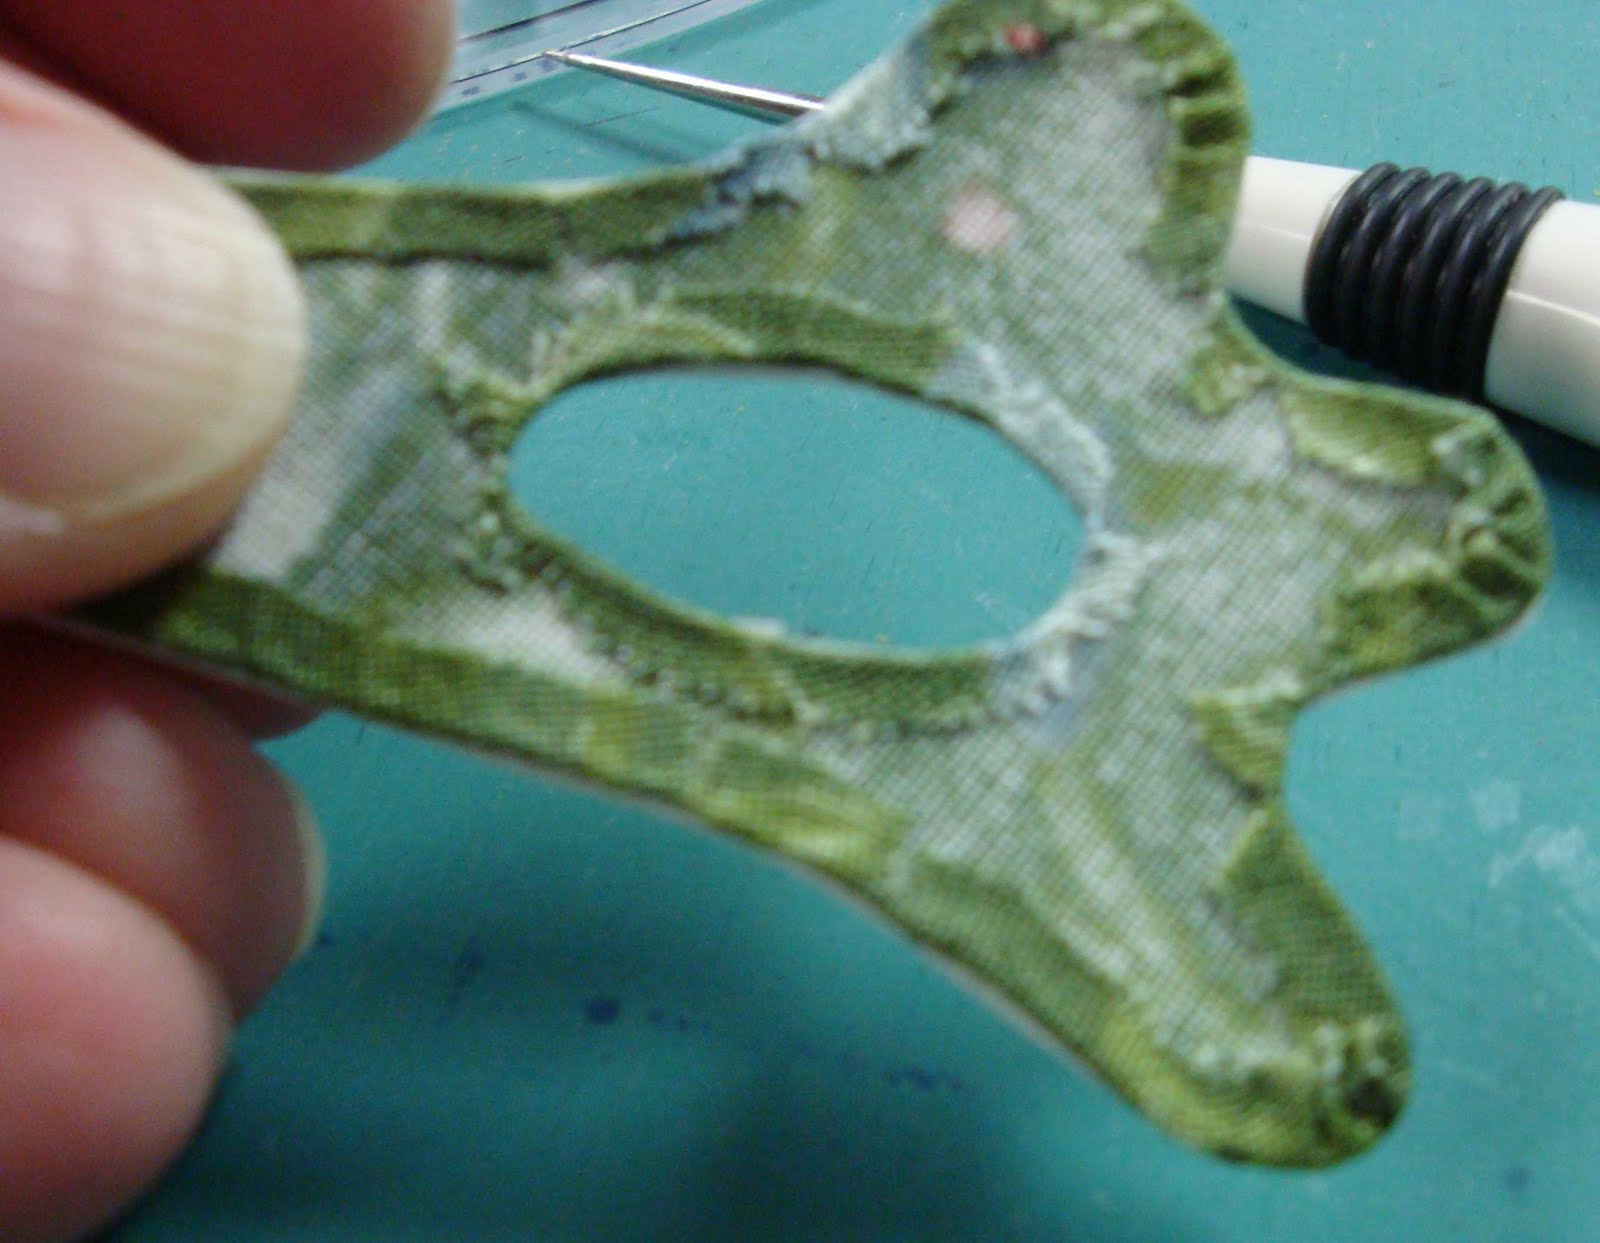
Some shapes require reverse applique to gain the proper perspective. In this, I create a little peep hole, then, eventually, place another fabric beneath it, in the window.

The outer edges are done the regular way...


...then I clip inside curves and glue to create the little peep hole.
I usually press pieces lightly between gluing and glue-basting/stitching so that my pieces are completely flat. If you are worried about excess glue, put a scrap between the iron and your nice, neat pressing cover!

Nice and crisp...just the way I like them!

How about circles? They are a little messy. I find it easiest to get a completely round circle by gluing all the way around before starting to fold the edge over. If your circle is smaller than the end of your finger, this means there is very little unglued area for your finger to hold the circle.


This circle is smaller, and I think the lighter color will make it easier to actually see what I've done.


Now you can see the tiny pleats. A really small turn under allowance makes this pleating process easier and neater, but don't trim away too much...then you have to deal with fray.

OK...now the weird. I have found these damn bird/chicken feet the hardest thing I've tried...with either hand applique method! It takes a combination of all methods to make it work...and sometimes some "fowl" language. (yuck-yuck-yuck)

I blunt my points a bit to get rid of some bulk and clip the angles at the...ankles (?)...


These feet aren't for the faint of heart...there is no shame in using embroidery, ultra suede, or simply screaming (or hiding bird feet under extra leaves).


To sum up, I love this method! The one thing I have not figured out yet is how to do this on scrappy pieced backgrounds, which I love. Seams sewn with cotton thread tend to pucker when wet, so I think the soaking part would make me scream (and the subsequent trying to make the block beautifully flat and straight). The purple glue stick is supposed to be acid free and archival quality, but I am still a little freaked out my leaving it in, especially on heirloom quality quilts.
When I did my Civil War Bride Quilt, I also ran into the problem of connecting appliqued borders when they are machine pieced around corners...hmmmm. I got around this by appliqueing my borders separately, washing, trimming to size, sewing onto the quilt, then bridging the corner by using the needle turn method to applique the pieces that go over the machine seams.
If anyone has any ideas how to deal with doing this on pieced backgrounds, let me know!! Let me know how this all goes for you!
In stitches,
Teresa :o)
Awesome tutorial! Thank you. I want to try applique soon.
ReplyDeleteDefinitely the best quilt-related tutorial on the web yet! You've added so many things to my shopping list! LOL! Thank you!
ReplyDeleteVery special tutorial! Just love all the photos for visual back up. So many wonderful tips.
ReplyDeleteGreat tutorials. The photos are so helpful. In your photo of the basket, I end my applique' with a couple of stitches like you and a tiny knot. Then I run the needle in between the background and applique' piece for about an inch...like I would if traveling in hand quilting. I feel like that will keep my knot from moving if anything decides to shift. I guess I need to get one of those purple tools and try the Roxanne glue again. I like using the Sewline glue pen, too.
ReplyDeleteI use a lot of the same tools as you do - love the purple tip to unclog Roxanne glue - I have been using it for several years now.
ReplyDeleteKaren
http://karensquilting.com/blog/
....clapping....clapping....thanks again Teresa!
ReplyDeleteYou answered several questions I had today and I'm glad you showed the back of your work too. That is how I end off my stitches too, so that is one thing I am doing right..ha! Your tutorial is spectacular and soooooooo user friendly! I can see me hanging out over here
A LOT in the near future!! I hope you don't get tired of me. Ha! I plan on reading this over and over again!!
Teresa.....thank you so much! This tutorial series has given me inspiration to try some of the applique patterns that I have always loved, but were never quite sure how to do! You're awesome! (and your photos are better than you think....we can see the process perfectly! Thanks!)
ReplyDeleteThis is all such helpful info! Can't tell you how much I appreciate the time and effort that went into this tutorial! I am also encouraged to know that the chicken feet were higher on the hard to do scale. I attempted just needle turning a "carrot top" this week...looks similar to the chicken feet and thought it looked like yuck. I took it all out when I realized I didn't like the placement...so now, I have another chance and more knowledge about how to do it :-) I don't have much of the tools that you recommend yet but still have a hint how I can do a better job. Fortunately, my piece is strictly folk art, just for fun and for me... less stress :-) Thank you!
ReplyDeleteThis has been an amazing tutorial, Terea! Thank you. But I think it would be even easier if you did my appliqué for me!
ReplyDeleteTeresa ~ thanks so much ~ fun tutorial and I hope to try your method soon
ReplyDeleteOnce again, a great tutorial! Thank you for all the information on using silk thread, I will have to try that.
ReplyDeleteThanks for the great tutorial. I love learning new tips and ideas. So very helpful!
ReplyDeleteOh my goodness! This is SOOOOOOO Awesome! The pictures are fantastic, whether you took them or DH.. they are so very, VERY helpful... I'm just thrilled to pieces! I always love tips and these are sure to make me a little more confident. It was great to see you trim on the back of your fabric.. I would be so chicken to trim anything off for fear that it might fray.. so now.. I won't be such a chicken! I may just get goin on those projects :)
ReplyDeleteExcellent tutorial. Thank you very much:)
ReplyDeleteThanks for the tutorial! REALLY helpful to see that the chicken feet type pieces also give you troubles too! My biggest problems are with turning the "U" shaped pieces (narrow U's), and deciding how many clips are needed--feel like I am just fraying away what little fabric there is by the time I get it done. Do you ever use fray check (or similar?) I am not sure why a pieced background would be that hard, but I've not tried one. Thanks for all the tips--I'm going to look for that purple item to clear my glue (I use flower pins now for that now)
ReplyDeleteThanks Teresa,
ReplyDeleteWhat a great help this tutorial is for us newbees. It really is wonderful.
Love your quilts
Judy
Fantastic tutorial Teresa. You make it look so easy , such tiny pieces you are working with!
ReplyDeleteYour photos are great by the way.
Oh Teresa, I'm getting better...just have to remember to read what you've written V. carefully before I start trying to do it too. Thank you so much.
ReplyDeleteWOW Teresa, this tutorial is wonderful!! Thank you for going through so much work to demonstrate everything!! I know how many hours it took you to put this together :0)
ReplyDeleteCrispy
Thanks for the wonderful tutuorial. I do applique freezer paper method on the wrong side and turn the seam allowance under and thread baste it down, usually. I have done the paper on top and done needle turn but without using the glue method. I do use silk thread, have one YLI but I prefer Tire brand which is not as super fine as YLI. And I do use Thread Heaven on my thread and straw needles or other needles, and a thimble. BUT never used a glue stick so I am going to try that. The recent applique that I did was hearts and I had trouble this time making the points be sharp, tho in the past I have done much better. I think your tutorial is just what I needed to give me the help I needed to do better work. So thanks again. I'll be buying some glue asap and trying it out.
ReplyDeleteThank you, Thank you , Thank you for these. :) I used the method last night and LOVED IT!! I'll really like using it for my purse live-in project - no more pins to poke through its bag or fall out over time.
ReplyDeleteGreat series of tutorials, do you feel like you have finished a big term paper? The pictures were great. Thank you for all the work you put into these and for sharing your wornderful method, I can't wait to give it a try.
ReplyDeleteI really appreciate the tutorials that you've put so much detail and work into. My initial try was awful, maybe I should start with simpler bigger shapes first to practice.
ReplyDeleteWhat a great tutorial - so thorough! Very unique method with the freezer paper on the outside, I will definitely try this! Something that works for me is using pinking shears to trim my circles, It cuts perfect little wedges for the curves to lie flat with no pleats, though you have to have a little wider "hangover" fabric. Not sure how it would work on teensy circles like these. Thanks for sharing your expertise!
ReplyDeleteWonderful tutorial - wish I had found your blog earlier - very much appreciated!
ReplyDeleteWhat a great tutorial. It is the best that I have found. Very thorough and informative.You definitely should receive an award for such a great lesson on applique. Thank you!
ReplyDeleteTeresa,
ReplyDeletewhat excellent tutorials you have done. Thanks so much. I learned some new things. Thanks for sharing about how you wash the blocks. I am working on a block that has pieces glued down. Now I know the best way to get the glue out.
Thank you so much for this wonderful tutorial. It was like taking an applique class without leaving my home. It is great to see how other quilters do their applique. I always pick up some new tips everytime I take a class. Thank you again for all the time and energy you, and your phantom photographer (LOL), took making this tutorial.
ReplyDeleteYou are just amazing!!!
ReplyDeleteJane
no wonder your work is so beautiful, your prep work is amazing.
ReplyDeleteThe thimble looks great on you, lol :)
Wow!! Great tutorial! I have some applique projects I want to work on...I will be memorizing your instructions!
ReplyDeleteDeb @ clutteredquilter.blogspot.com
As always ... you are the QUEEN of whatever you do.
ReplyDeleteWhat an excellent post Teresa! I use the Jeana Kimball Straw needles also and just love them.
ReplyDeleteThank you so much, for taking the time to put these tutorials together!
ReplyDeleteWow, this really gives me the feeling I should actually start!
Hi Teresa
ReplyDeleteI am also from Michigan . I use to live in the south east loweer pennisula.I now live in the north east lower penisula. Your tutorial is fantastic! Thank you so very much. My 2 favorite quilting methods are applique and craqzy quilting. Karol
I cannot read this without sending you a big Thank You!. What fantastic information you have given us. I have always been leery of hand turned applique but I feel anxious to give it a try now. Of course i will return many times to work out the details. I am so grateful.
ReplyDeleteCindy
??? What is the importance of washing out the glue in advance of assembling the quilt top? I do like to wash after quilting.
Excellent tutorial. You do such beautiful work.
ReplyDeleteThank you for for these three tutorials - I think you've converted me to glue! I haven't done much appliqué and I was searching for a good method and is is the best tutorial I've found by miles :)
ReplyDeleteThank you, thank you, thank you... I've been quilting for some time, but I've not done any applique. This tutorial has given me the tools I need to finish a Christmas quilt.
ReplyDeleteThanks for the great info about applique. I do have a suggestion for finishing off. on the back of the background, make 5 or 6 feather stitches, or the same number of small stitches inside the applique. Then push the needle into the back, and pull up about an inch or two away from the stitches. Cut and you're ready to go. I've been doing this since the '90s and learned it from Pat Campbell.
ReplyDeleteGreat tutorial, thank you. I will be doing my applique in this manner from now on. Needle turn has always frightened me, lol.
ReplyDeleteHow easy is your method!! Fantastic
Absolutely Fabulous Tutorial Teresa. I will have to try your method although it will be hard doing it with the paper on top. I have used the freezer and starch method with the paper on the wrong side of the fabric.
ReplyDeleteIt'll just be a matter of getting the brain to work the other way. :-) Thanks again for all your work!
Thank you! This method has been a sanity saver for me!
ReplyDeleteI have been needle turning for years. I would love to try your method. Ya know after a few years of doing it one way , ya always think there might be a better way out there but afraid to try.. I will b eon the look out for the weights you use.. couldn't find them on amazon... you did a great job with this lesson. Thank you Randi
ReplyDeleteI can't wait to try this method on my next project! Thank you for a wonderful tutorial!
ReplyDeleteThink this is a first visit for me, but loved the tutorial, and the chicken, bird feet bit and "language" comment. I'm with you babe, understand completely. Haven't done a lot of applique but do like it. Very enjoyable post.
ReplyDeletePart 3............................You're terrific. Thanks for all you do.
ReplyDeleteOh my gosh! What a wonderful tutorial!!!!! I've emailed your first and second tutorial to myself, but as I'm typing this I don't see where I can email your final tutorial on this project to myself...but I'll keep looking!
ReplyDeleteThank you so very much for all the time you've taken typing out your instructions and taking and posting such wonderful photos! I'm very grateful!
Warmest regards,
Barb Flavin
Great tutorial. I wonder, if in regards of the pieced backgrounds, if the following would work: Not trying to get the glue out until after the quilt is quilted. Soak the whole thing then. The seams of the pieced background are not exposed that way, but the glue should dissolve. I would do this before binding and squaring up the quilt. One could try it on a small piece and see if this works.
ReplyDelete