Friday, February 5, 2016

Taking a longer view...


I found part of my design wall!  I just slapped blocks up in a random, alternate order...it will change.

I can only get seven blocks across on this piece of the design wall...one setting I am toying with is an alternating setting, nine blocks by nine blocks.  I would need forty-one applique blocks and 40 pieced blocks.  I think I have all but 3-4 pieced blocks, but I am really behind on the applique blocks.


I am having a hard time getting good pictures, so I will present them in sections.


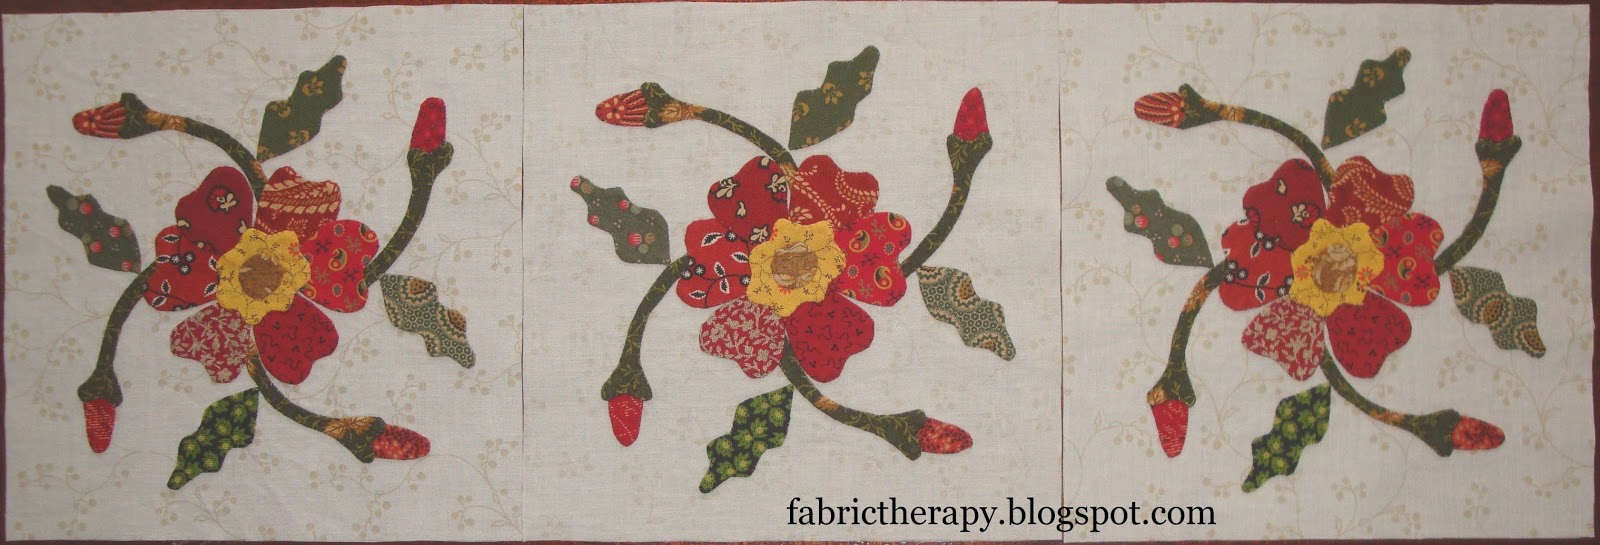
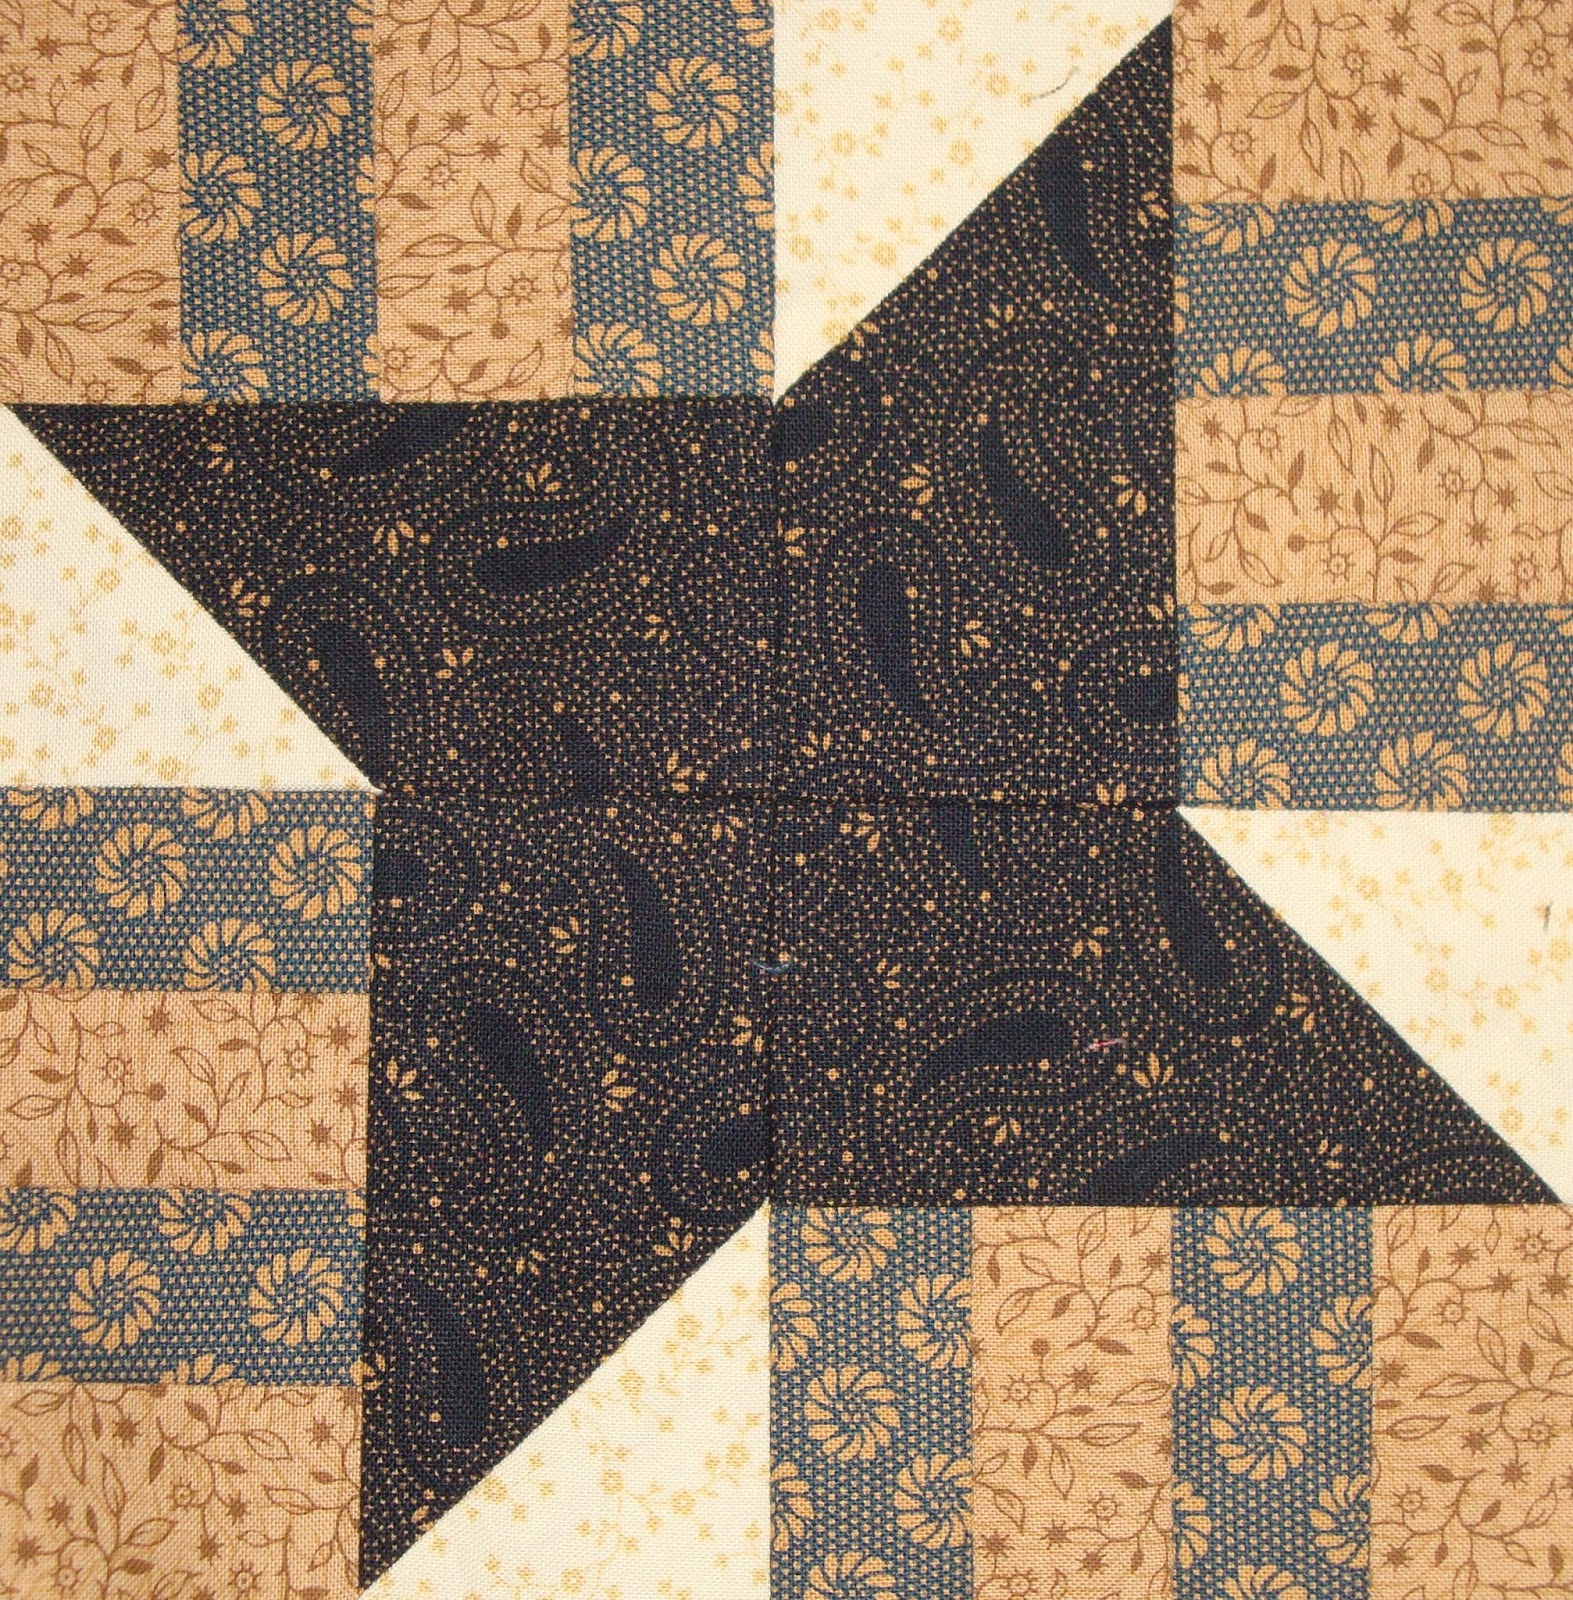
All the blocks will finish 6 inches.


Should I sash between blocks, should I not?

I am also considering a medallion setting with a larger applique block in the center.  And some interesting alternating borders would be fun...hmmm...I have a lot to think about as I applique away.

Here are Mary and Ola's blocks in all their glory...all 6-inch blocks. I am so lucky!  They are WICKED good piecers!


I have glue-basted two more blocks.  The holly one seems OK, but I might put a lighter "twig" in the squirrel block so that I don't "lose" the tops of the acorns...

Yep...I will definitely tease out that little twig and make a light brown or light green one...


In stitches,
Teresa  :o)

Wednesday, February 3, 2016

Downton Abbey binge-watching pays off...


Two more finished sets of three 6-inch hand applique blocks are done!  Can you tell that my Downton Abbey DVD arrived?!?  The first block is a Rose of Sharon spin-off...


...and the second, Lazy Susans.


From time to time, I get emails with questions about using glue for both turning my applique edges under and for "glue-basting" the little pieces to the background.  People are worried that the glue is harmful over time or really stiff-feeling.  Let me explain...

For gluing fabric edges under, I use Elmers 'Disappearing Purple' Glue Sticks, usually in the smaller size (0.21 oz).

The small size works great for many reasons:

  • The small stick is better on small pieces because it is less clumsy.
  • They are cheap!  If you leave the lid off and it dries out, they are less than a buck to replace.  I go through a stick pretty quick, but if one does get a little old and a little too hard to apply without pulling my fabric piece off the freezer paper, I just toss it and open another.  Did I say they were cheap??
  • The disappearing purple makes it easy to see where you have applied the glue (so that you don't use too much!).
  • They can be found almost anywhere...the grocery store, dollar store...anyone that sells school supplies.
  • If you do leave a little glue on your fabric, the glue is "archival quality" and won't hurt your fabric over time.
  • It is very easy to dissolve and wash out...of your project and off the surface on which you glue your pieces (I use rarely-used, specialty quilt rulers or Plexiglas pieces and just remove the dried glue with warm water).
(Steve recently brought me home the larger, 0.77 oz glue sticks, by accident and I am using them...it is possible!)

I like to glue-baste my applique design pieces using tiny dots of washable glue.  This way, I don't have to deal with pins, which can fall out and I snag my thread on while stitching.  Initially, I always used Roxanne's Glue-Baste.


I like the Roxanne's because it dries just enough to secure very quickly and holds fast until soaked out.

But lately, I have been experimenting with Elmer's Washable School Glue.


  • It is cheaper.
  • It's easy to find...same places as the glue sticks.
  • It is thinner, easier to force out of a needle applicator bottle.
  • It dissolves faster and easier in water when I soak my blocks.

One drawback of the Elmer's...I have to be really patient to allow the pieces to stick together longer before moving or sewing than when using the Roxanne's, probably because it is thinner and has a higher water content.  If I am not patient, my pieces can come loose as I am stitching.


I found some plastic applicator bottles with a needle tip on Amazon...I still like that "dot-dot-not-a-lot" idea when I am applying glue.  I just transfer the Elmer's School glue into the empty applicator bottle.  That way I can better control the amount of glue so that I am not trying to stitch through too much dried glue!

So, I still use both the Roxanne's and the Elmer's to glue baste. When I am working on a bigger block with lots of pieces, or stitching some of my glued up motifs before placing them on my background, I like the security of the Roxanne's.

I like to use these little stabbers to clear the needle tip when it is blocked with glue.  They are sold by P3 Designs in bags of three.


I remove all the glue BEFORE trimming the blocks to size, as shown in the pictures posted below.  I start with my background squares cut a little larger than I need...like 0.5 - 1.0 inch on each side, depending on the size of the finished block.


I soak them in water until the water remains clear and not cloudy when I gently squeeze the scrunched-up blocks (generally, just starting with warm water, squeezing to get them thoroughly wet, and leaving them overnight does the trick).  Then I replace the water in my bowl/sink until it remains clear.

Next, I gently squeeze most of the water out and roll them in a clean towel.


I place the first block a couple of inches from the bottom edge of the towel... 


...fold the towel over the block and roll, then add the next block...


and so on...


Ta da!


Now I gently squeeze the roll.


Next, I leave the blocks to air dry until they are just damp.


Now I put a clean hand towel over my pressing surface and put the block, right-side-down on the towel.


I press with my dry iron until the wrinkles are gone and the block is mostly dry.  (Because I pre-soak/dry and pre-shrink my fabric before using it, I do not worry about colors running or my work drawing up during this process.  I would like to think that all the block soaking would remove excess dye if you don't pre-wash your fabrics.)


I do this so that the applique design on the right side of the fabric has a nice, raised, dimensional look.  I know I was successful when I see the design pressed into the towel...(you can see it if you look closely!).  If you press on the right side, sometimes the design can get a shiny, unpleasant look.


Now I am ready to trim it down to the 6.5 inch square I need for my setting.


You can sort of see the raised dimensional aspect of the applique in the following close-ups...


Want to know something funny?  I accidentally glued one of my applique scenes on the WRONG side of the background fabric! (Don't worry Ola and Mary...I will keep that one...)  I did not notice this until I was pressing the blocks prior to trimming.

Right side of the background fabric...


Wrong side of the background fabric...


If you look really close, you can tell the block in the middle of the set of three is different.  Oh well, sometimes people use the wrong side of fabric on purpose!


I will not spoil things for any of you, but I just have to say how much I enjoyed the final episodes of Downton Abbey.  I did a little binge watching last night while stitching.  I am sad that it is all over, but I am excited that there is some talk about making some spin-off movies...

Happy Stitching!

Teresa   :o)


Monday, February 1, 2016

A showy bird...


Downton Abbey DVD's did not come over the weekend, but I still managed to stitch another set of three 6-inch blocks!  These will finish 6 inches square.


Then, I finished the stitching on yet another set of three blocks last night while watching this week's installment of Downton Abbey season 6...the weekly dragging out out of the story is making me impatient to get the DVD's!!!  I may just hang out by the mailbox today...

I will get the glue soaked out of that second finished set, get 'em trimmed and post 'em directly.

I really love having something to stitch on while watching TV...it seems like such a waste of time if I am not doing something with my hands!

We spent our Sunday (yesterday) driving to Tuscaloosa and back to visit our college freshman daughter.  It is an almost 5-hour round trip, but worth it to see her and it is a scenic trip on little 2-lane roads.  Unfortunately, there are not many ethnic restaurants there, but we are managing to work our way through them on these occasional weekend lunch dates...yesterday, Japanese! 


Riley took a selfie on my phone...I wish I could be so fresh shortly after waking up (apparently it was a celebratory, late Saturday night after a tense weekend audition...), LOL.

In stitches,
Teresa  :o)

Friday, January 29, 2016

No bunny loves you like me...


Last post I showed you six new little 6-inch applique block sets that I had all prepped and glue-basted, ready to stitch.


I have managed to stitch up two sets, or six blocks; my fat, little bunny family and a crazy lily.


I have not received my Season 6 Downton Abbey DVD (I hear it's in the mail), so I have not allowed myself enough TV time to stitch more.  When that puppy arrives, there will be binge-watching and stitching!


I am getting excited about putting this REPRO MADNESS project together.  I have almost forty 6-inch pieced blocks from my Michigan buddies, and the number of applique blocks is rising.  I want to set them alternately, with or without sashing.


Just look at those cute, little bunny butts!


I have been working from a small box of reproduction scraps, until I have full access to my stash.  Some of the pieces I save are quite small, but I would want to make things scrappy even if I wasn't working from tiny pieces.  I hate making fabric choices so it is always more fun to use six different fabrics for six petals (or six ears!) than just one or two.

I hope you are finding time for placing some stitches...my mood is so much better now that I am able to do some designing and stitching again!  I have been working on organizing my upheaved and moved-across-state-lines stash.  I still have not found local quilt shops so I really appreciate having a stash!  I think going to a quilt shop will involve a lot of miles put on the car...sigh...

To all my Michigan friends...you are so lucky to live among such fabulous and plentiful shops!  And it is not just the availability of great fabric...it is the creativity that crossing those thresholds spawns, not to mention having great destinations to visit with quilting friends.

Spend your coffee and latte money at those shops to keep them in business!!  (Jennifer, don't you want to open a satellite shop down here???  Click on her name, then scroll down and check out the post where I feature pictures from her delightful shop in Pinckney, Michigan.  Then check out this post from The Doormouse in Bettsville, northern Ohio.)

In stitches (and missing my quilting shops and friends...),
Teresa   :o)