Friday, April 1, 2011

UFO Chocolate Bunnies...


Even though I still need to do the binding on "All Around the Town," I put the town in my rear view mirror for a while and looked ahead to the next UFO on my design wall.  These chocolate bunnies from Anne Sutton's pattern "Bunnies Prefer Chocolate" have been calling to me for a while. 

I started this project a few years ago, before I adopted my current favorite method of prepping hand applique.  I'm a little embarrassed to show you the close ups, but in full disclosure I'm going to show you why I put this project on the back burner.


No matter what kind of quilting we do, our skills and methods evolve over time.  There are no instant experts...in fact, I'm suspicious of anyone calling themselves an expert at any time.  There is always something else to learn, even if the lesson is just that we don't know it all.


I used to prep all my applique pieces by hand basting under the edges.  I started that so long ago that I don't know if I read it somewhere or if I just started doing it.  I know it sounds time consuming, but I got really fast at doing it.  I had all my little pieces in a baggie and took them out anywhere I had to sit and wait to prep with odd colored thread.  This made me fast and efficient.


It would yield a fairly satisfying result with gentle curves, but tight little curvy pieces always presented a challenge.


Since fabric frays (and some worse than others!), I would always cut a 1/4 inch seam allowance.  Anything smaller was hard to baste and have it stay turned under.  This meant I had to baste all these tiny little pleats.  So if you look at little curved pieces like these rabbit ears, you see a slightly herky-jerky edge, not a smooth curve.


I look at these pointy little chick feet now and marvel that I got such points doing my old method!  I think by this time I had adopted a few needle turn tricks to do points...when I would baste, I would leave stuff that I would later cram under with my needle as I was stitching pieces down.


I never favored or tried to master the needle turn applique method because I like the idea of making applique in units that I could move around during the design process.  I didn't want to trace an applique shape on a background and have to strictly follow that pattern.  I like to change things and add or take away elements, as my mood and design changes.


I used to make all my vines by cutting 3/4 inch bias strips.  Then I would fold and press one third of the strip, then press the other 1/3 of the strip over that and baste.  It worked very well for me and gave me a lot of design freedom.  


But it also gave me a lot of bulky turn under allowances to deal with under my pieces and limited how small a piece I could applique.  Just look at the points on these bunny ears and eggs!  When those Perfect Circle templates came out, that helped considerably to make my round shapes actually round.


I used to not mind that herky-jerky imperfection and I just chalked it up to "folk art."  I just labeled myself a "folk art" hand applique person and let 'er rip!


Sometimes, I would try to round out the herky-jerkiness with my needle (a la needle turn) as I hand stitched my pieces to the backgrounds.


But then I saw my quilting friend MaryLiz (no blog) playing around with Elmer's glue sticks, and my basting days were over!!


Look at the curves with my new method of applique prep on these letters.  I never could have done this with basting, even though I did try.  I tried this method on my Civil War Bride and was very pleased with the results.


I just finished hand stitching all these words to make an outer border for this quilt.  This idea for a lettered phrase border breathed new life into this UFO and made me want to finish it, even though I wasn't happy with my pointy-eared little bunnies and eggs.  I had been playing around with Tonya's free-pieced letters and loved her idea of adding words, humor and personality to quilts (Lazy Gal Quilting).


I know I keep saying I will do a tutorial on this method, and I've started working on one (so you should see it soon!).  Until then, I'll show you how I wash out the glue after doing the hand applique, since that is where I am in this project.

I use two kinds of glue, Elmer's glue sticks to turn under the edges of my pieces and Roxanne's glue baste to hold my pieces in place while I stitch (instead of using pins).  Both of these glues are acid free, and there are those that choose not to wash them out.  I like to wash the glue out, still convincing myself that maybe some of my applique quilts will still be around in a 100 years and I am ultra paranoid about putting stuff on my cotton.

Here I have plunged my appliqued backgrounds in a tub of water to soak.  (I'm a fabric pre-washer due to sensitive skin, so I don't worry too much about colors running...you can snip a piece of a color catcher and throw it in the mix if you are worried...)  The glue stick comes out pretty quick.  Depending how long the Roxanne's has been there, it needs to soak a little to loosen.  It is also important to note here that a little Roxanne's goes a long way.  I try to do Ola's (no blog) "dot-dot-not-a-lot" method.


Even though I thought I used tiny drops of Roxanne's, here I see I could still be using LESS.  My tiny dots look a lot bigger now that they are revealed in their "smashed together" form.  Now you see them...


 ...now you, almost, don't (I see I need a little more soaking and gentle squeezing time...).


After I soaked and did a little gentle squeezing (and changed and re-filled the water a couple of times), I stretched out the pieces on a clean, old towel, rolled them up and did a little more gentle squeezing (not wringing!).  Now my pieces are laid out and ready to be pressed (not ironed!) with a hot, dry iron.


I put a dry towel on my pressing surface, put the right side of the applique down into the nap of the towel, gently stretch out the wrinkles, then press until "dry."


When I turn over my piece, it is mostly dry (it will air dry the rest of the way), and the applique is slightly raised because it was away from the iron's cruel pressing weight.  This also helps to avoid that "shiny, ironed" look raised work can sometimes get.


Here you can almost see how the letters look a little 3-D...I LOVE that look (Weasley is bored with the whole ridiculous process...). 


Now the pieces are ready to be trimmed and made into my border.  See ya later!

In stitches,
Teresa  :o)

Tuesday, March 29, 2011

The quilting is DONE!


The hand-quilting is DONE!!  I'm so excited, can you tell?!?  I need to bind it, but it smells like "All Around the Town" (Sue Garmon) is done!


I decided to do a little "memory test" quilting in the stop border (the road).  I quilted every street, town, and state I've ever lived in, starting with the house I came home from the hospital to when I was born.  


It was a little tricky getting it all to fit, but it worked out.  Now I don't have to remember anymore...I'll just reference the quilt if I need any of that information...grin.


One place in Bethesda, Maryland (where I was born), four places in Birmingham, Alabama (where I grew up)...


...three places in Auburn, Alabama (college years), two places in Ypsilanti, Michigan...


...one place in Galveston, Texas (sure loved living close to Houston for the International Quilt Festival for 4 years)...


...then back to Ypsilanti, Michigan, where I live now.  I should name the quilt "Around the Eastern Half of the United States."  Here's the empty spool of YLI quilting thread...I used at least 400 yards of thread in this quilt.


I decided not to try and assign specific addresses to specific houses...I just quilted them in chronological order.


I included family property in the Canadian 1000 Islands and northwest Alabama where we spend a lot of time.


I will bind it in the same fabric as the outside border.  Then I will probably put a hanging sleeve on all 4 sides and rotate it from time to time.


Now, I should pay a little attention to my chocolate bunnies...Easter is coming!

In stitches,
Teresa  :o)


Monday, March 28, 2011

Quilting in the grassy knoll...


Oh, I know these detailed quilting shots are getting old and boring for you to see and read about, especially if you aren't a fan of hand quilting, but this is nearly the end!!  I am so close to being finished hand quilting "All Around the Town" (Sue Garmon).  And it isn't even the night before a quilt show where it is entered...LOL!


The quilt show block's grassy bit needed quilted grass to match the grass-like print.


I finally decided how to quilt the wooden end of the barn.  The quilting isn't this noticeable - the camera flash seems to really bring the stitches out.


This is basically all the background I have left to quilt...oh, and the skinny stop border (the road).  Other than that, all the quilting is done (happy dance...).


Oh, I spoke too soon...I see one little diagonal line of quilting on the church I forgot to do...DOH!


I tried to vary how I "quilt filled" the grassy bits so that no two styles would be right next to each other...I tried stars on the church lawn.  I drew some crosses, but they just looked stupid. 


The "hick house" is done, complete with a quilted pocket on the overalls and a fly on the boxer shorts (hee-hee)!


Hearts on the lawn around the kitty...but of course!


Another grassy fabric required more grassy quilting...it won't really show up...I'm the only one that will know about this quilting (and maybe you, if you can see it...).


The last house to fill in...


I've had to sit through some meetings and wait in the car for my daughter lately, so I managed to get some of the appliqued borders for my chocolate bunny quilt hand stitched.  The words are a very portable project once they are prepped and glue-basted into place on a piece of background.


I bet that word got your attention!


This is not the final phrase for the border, but it is fun to play "sentence scramble" as I get the words appliqued, out of order.


Apparently Weasley (yawn) doesn't find me as amusing as I find myself and my quilting in the wee hours.  He is getting bored with "All Around the Town."  Time for Bed!


I have two quilt tops ready to take to a machine quilter tomorrow to send to Japan.  I will share them when they are quilted next week!  I wish I had time to hand quilt them, but Rhonda Loy of Dexter, Michigan does a nice job, and her turn-around time is amazing!  I want to send these quilts as soon as possible!

In stitches,
Teresa  :o)

Friday, March 25, 2011

Quilted sails and puppy dog tails...


The "Eulean" is now quilted and ready to board!  (it's a family name pronounced "you lean," which is what you do in a small sailboat...get it?  giggle-giggle).  I love it when the fabric tells me how to hand quilt something...less marking and brainstorming on MY part!


We are getting down to the nitty gritty now...filling in lawns and fussy little places on the houses....and all those tight little background spaces between other appliqued shapes. 


Depending on the fabric, the hand quilting is either "in your face" or impossible to detect.  I quilted random tile shapes on the roof above and it is completely hidden by the fabric.  Then I filled the lawn below and it really shows up (the flash on my camera makes it seem more noticeable than it really is).


I still need to go through the whole quilt with a damp cloth and rub away all my chalk marks.  I quilted a little heart on the dog's haunch to match the grassy area...


I was having a hard time trying to think of something to fill in the shrubs with, then I decided on half daisies.


I love quilting hearts...


Oooo!  I'm getting excited because I'm getting close to finishing the quilting.  Weirdly enough, that also makes me sad.  It has been a great project to work on.  I've decided to quilt addresses of places I've lived in the skinny "road" border, under the houses.  We'll see if I can remember all those addresses!

I am so touched by the calls for donated quilts to send to Japan...I want to see what I can do over the weekend to finish a couple of tops that can be machine quilted next week to be sent.  A quilt is the first thing I think of when I need to be comforted...either to work on or to wrap up inside. 

In stitches,
Teresa  :o)

Monday, March 21, 2011

Weaving my quilting web...


As I was filling around the barn of "All Around the Town," I finally decided on some of the quilting to fill IN the barn.  It seems like every time I go into a barn, I walk through a spider web, so that was a MUST. 

The "ROCK CITY" on the side of the barn only makes sense if you are from the southeastern USA, or if you were really observant when you were visiting that area.  There are these attractions (rock formations and an underground waterfall in a cave) to visit where the states of Alabama, Georgia and Tennessee intersect near Lookout Mountain.  They are called "Rock City" and "Ruby Falls." 

When I was growing up in the south some 40 years ago, advertising for these places consisted of paying farmers to paint a billboard-type sign on the tin roof or wooden side of barns located along prominent 2- and 4-lane highways.  Not only could you see the "See Rock City" or "Visit Ruby Falls" signs from a car, you could spot them from airplanes!  I get very nostalgic every time I see a faded sign on a barn that is still standing when I go home for a visit.  Now there are ugly billboards everywhere.


I've been filling toward the corners...actually made it to one!


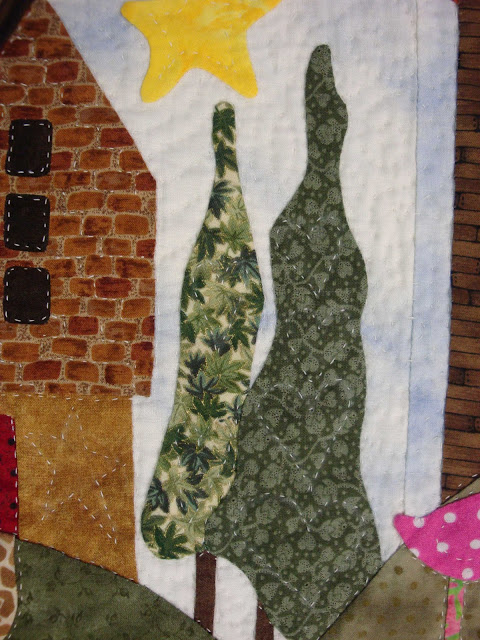
I quilted along imaginary bad mortar joints on this brick house.  It's fun to let the fabric dictate the quilting design.


More trees to fill with hearts...


And the adventure continues...

In stitches,
Teresa  :o)