


"X" MARKS THE BLOCK - THE TUTORIAL
Are your strippy scrap bins or bags stuffed to bursting? This is a great scrappy project to help you reduce some scraps and ALL WITHOUT A PATTERN (sometimes a project without a pattern is like a day without pantyhose...ahhh...).

I don't use a paper or fabric foundation when making these blocks...mostly because I am too lazy to reproduce the foundations, then later peel all those pieces of paper off my sewn blocks. If you would like to use a foundation, go right ahead...it's all good. But I challenge you to try one block without a foundation to s-t-r-e-t-c-h yourself.
Here's the ONE I tried with a 8.5 inch paper foundation...it was really harder than doing it without one, believe it or not...

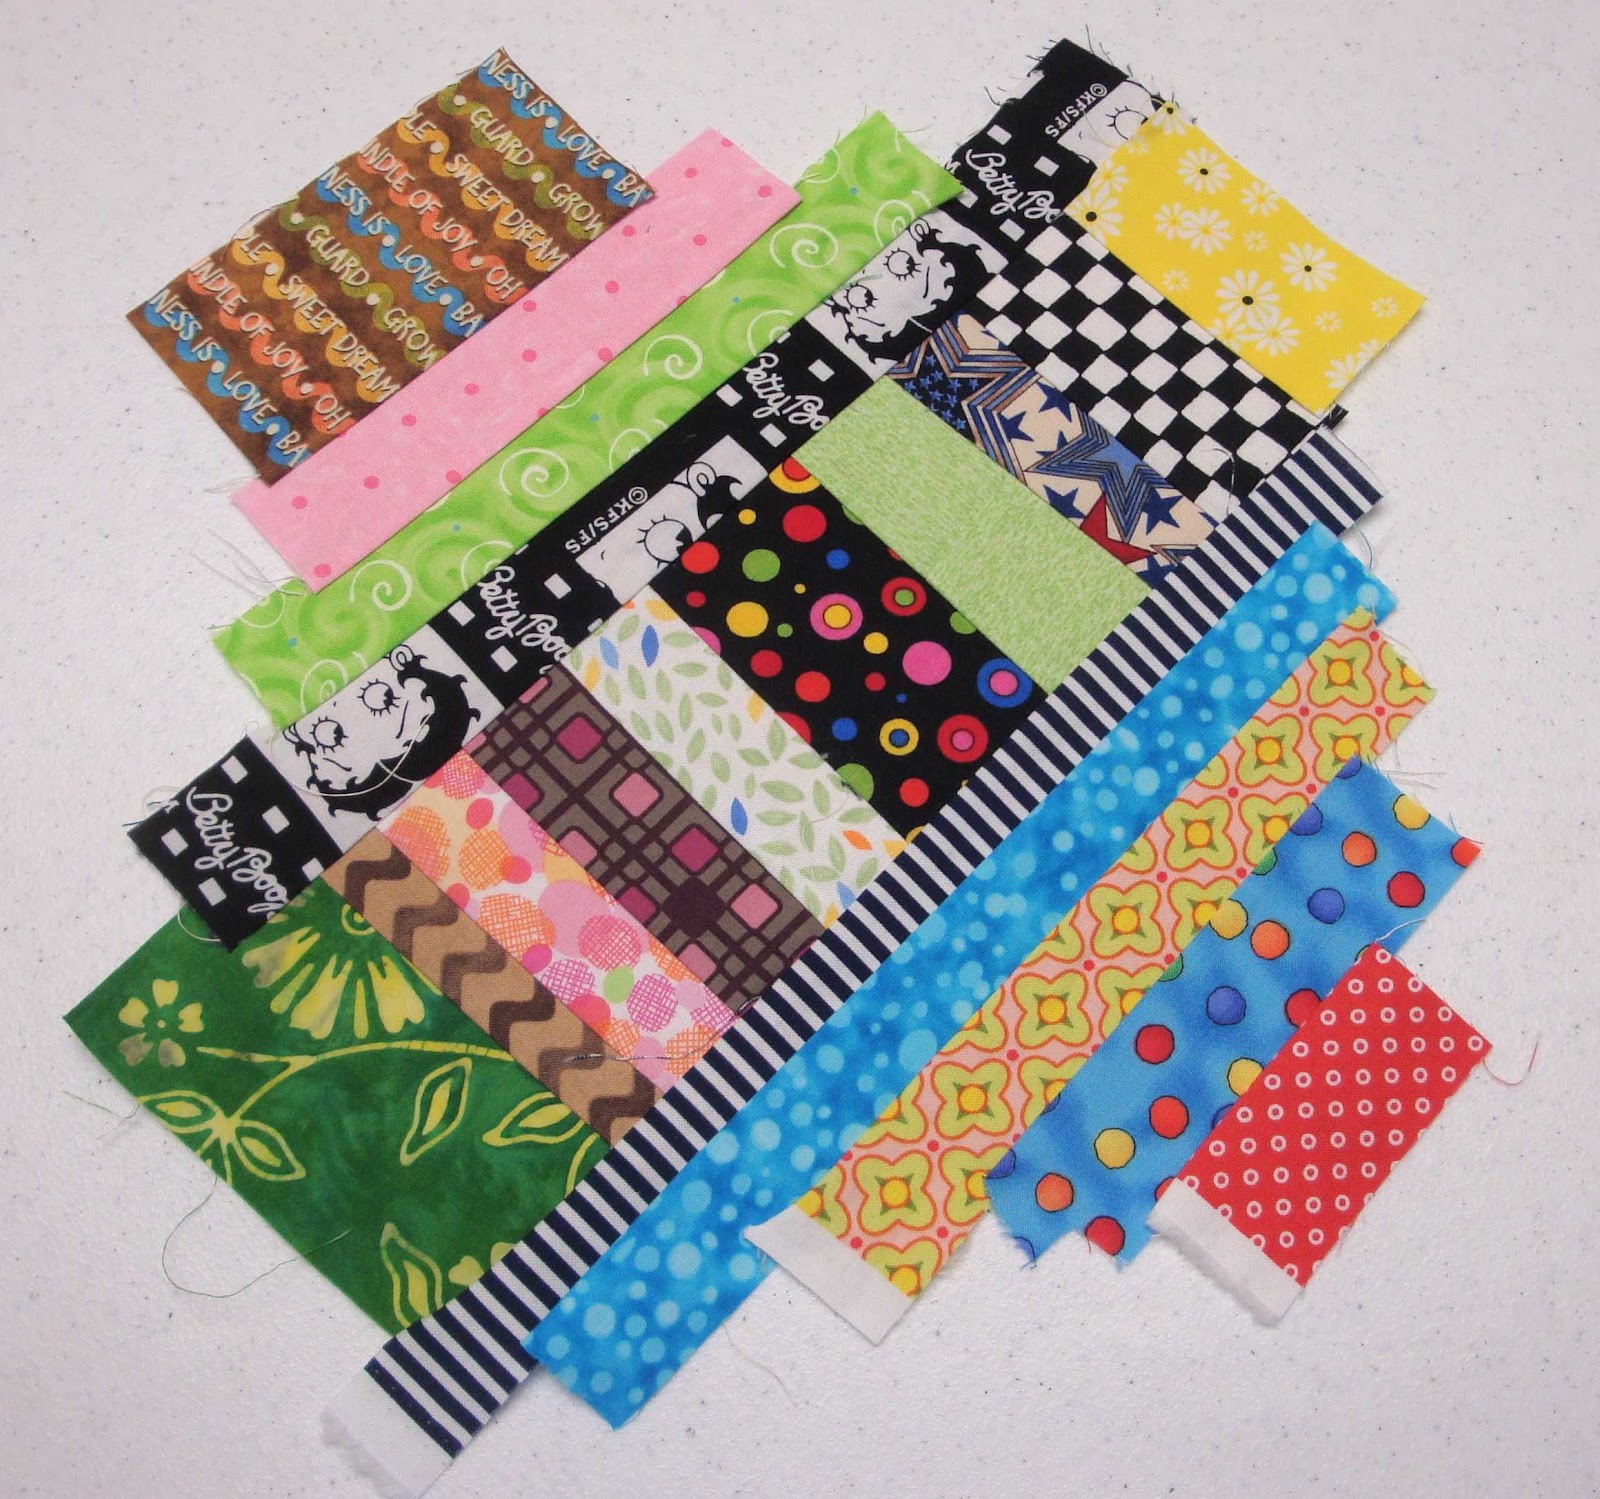
This block/quilt uses mostly "strips" and "chunks." I define strips as anything from 3/4 - 2-1/2 inches wide. I try to keep them separate in my quilt cave - that way I don't have to dig through all my scraps just to find strips. Chunks can be odd-shaped, cut-off chunks of leftovers or wider strips, maybe even extra triangles or squares.

If you are careful and use fatter strips at either end of the central pieced section, you don't have to fool with using chunks. We just don't want to trim down our final blocks and find too many seam allowances in the corners where blocks meet.


The focus fabrics that form the "X" need to contrast the rest of your general scraps. I used blacks with brights. You could use something light as well, or maybe a color. Your "X" strips can either be scrappy like mine or all one fabric/color. Medium to dark batiks with light "X" strips would look cool. Maybe red and neutral scraps with green "X" strips for a holiday quilt. The sky is the limit!


I cut my "X" strips 1 - 2 wide. The variation just adds to the wonkiness and draws attention away from the fact that the "X" strips don't line up between blocks. You can see below how the scrappy black strips are different widths and don't match up precisely...charming! Sometimes, my strips are wider at one end than the other...even MORE charming!


After looking at my available strips and chunks, I chose to make blocks that would finish eight inches square. I had some short, stubbly strips that were 3.5 to 4 inches long, so I decided on a center diagonal strip that would finish about 3 inches wide.


After looking at your scraps, you may decide to make smaller or larger squares, of maybe even rectangles, triangles, or other shapes. I will show you how I figured out the rough dimensions of my units, then you can apply what I did to your size block.


Each strip added to the central pieced strip needs to be at least a half inch longer in each direction than the edge of the ruler.
Now you can vary the size of your blocks and central pieced strip to please you. Just be sure to allow adequate overhang of strips so that when you square up your blocks you won't have any holes!
Just because you see brights and blacks in my tutorial doesn't mean that is the only color option possible. Look at your scrap stash, then decide how YOU want to proceed. You can even do it without a contrasting color for the "X" strip.
Look at the backside of this finished block to see how you should press your block as you progress. I pressed the central pieced strip only after piecing the whole thing, then pressed the seams in the same direction, either way.

Then starting with the black focus strips, I pressed each added strip to the outside.

Now just fill some bobbins, put in a new sewing machine needle, replace your rotary cutting blade, and let's get started!
STEP 1:

Some of these strip sets have a triangle or chunk at either end, sometimes just a piece of a wider strip. I do this to avoid an accidental seam too close to the corners where 4 blocks will meet.
Start with a chunk, wide strip or triangle at one end, then chain-piece strips together, matching up one end of your irregular, variable in length, short strips. Do not worry about pressing after each addition of a strip. Check the length of your pieced strip as you go. This central pieced strip needs to be at least 13 inches long...make sure you stop in time to place another chunk, wide strip or triangle at the opposite end.


Turn your strip sets over and press ALL the seams in ONE direction, either way.
STEP 2:
Now you are ready to sew on the contrasting focus "X" strips, right sides together. These should be at least 10 inches long (1 - 2 inches wide), CENTERED along the edge of your pieced central strip. I place the first strip along the "straightest" edge of the strip set, lining up the edge of the shortest strip (the cow strip in the following set).

Even though this is wonky sewing, I still maintain a quarter inch seam allowance when I can (old habits are hard to shake...). A consistent quarter inch seam allowance is not critical while making the blocks, but will be very important when sewing the blocks together into a quilt top.


After stitching, trim away extra seam allowance with your rotary cutter or scissors (trim the uneven end of the central strip set even with the quarter inch seam of your "X" strip).

Press strip to the outside.

(I like to chain stitch several of these units, then sew on the opposing strip before stopping, trimming and pressing.)

Place this opposing strip. face down and centered on the other side of the strip, with the help of a ruler (or just "eyeball" this for extra wonky-ness). Your stitching line should be at 3 inches (or the outer edge of this strip should be 3.25 inches from the opposing seam).

After stitching, trim away extra seam allowance with your rotary cutter or scissors. (Would you believe I save some of these longer cut away leftovers? That will be the subject of another liberated tutorial project!).

Press strip to the outside. (Again, chain piecing really saves time with this method.)

STEP 3:
Now we can start adding strips, one on each side, building our block, chain piecing and pressing to the outside after the addition of each new pair.

As you continue centering strips (chain piecing), adding strips to each side, notice that they are getting shorter and shorter. Press toward outside before adding the next pair.

Just make sure the strips are long enough so that when you trim down your blocks there aren't any surprise "peek-a-boo" holes.


Please notice the left side of the block pictured below. The white-ish strip just under the left corner of the ruler is a little too wide and would cause there to be a seam too close to the corner of the block. Just slice or cut some of it off so that your last strip will form a larger triangle after the block is trimmed down. You may need to make a few of this kind of adjustment as you go.

Place your block on a small cutting mat. Square up your block by placing the 8.5 inch ruler on top, centering the ruler's diagonal line in the middle of your center strip set and sliding the ruler back and forth until the end triangles are centered and all seams are solid under the ruler (no "peek-a-boo" holes...).

Cut away each side, turning the MAT, not your block, as you go.


A small rotary mat works OK, but I like trimming these blocks on a revolving rotary mat, like this Brooklyn Revolver. It has a 'lazy Susan' mechanism that allows you to easily rotate the block as you trim each side away (I just LOVE a good gadget...). There are other versions of the revolving rotary mat out there...here's the Olfa offering from Joann's Fabrics online (use your coupon on it!).

Ta-da!!! You did it! Now you can make as many or as few blocks as you want. For each of the quilts pictured at the beginning of the post, I set 8 blocks across, 10 blocks down, with a 1.5 inch (finished) stop border and outer borders of either 6 or 5 inches (finished). The green-bordered quilt measured 79 x 95 inches and the one with red borders, 77 x 93 inches.

I recently taught a class on this block at my LQS. Janet S worked with her medium to dark, earthy scraps, with a consistent light "X" fabric (she cut her light strips the same width throughout). She ended up cutting her remaining setting strips more consistent in width, while keeping her central pieced strip wonky.

Lori L used fun, colorful scraps with lime green "X" strips. I've never seen such a fun bag of colorful, happy scraps (I admit it...I had scrap envy!) Both had stunning results!

When it comes down to piecing the blocks together, sew in rows, pressing the seams to one side, alternating direction every row. This way the seams will nest nicely for beautiful, accurate piecing. Remember that the edges of your strips are most likely bias edges, so handle them carefully until they are seamed in and stable to they won't stretch.
ENJOY!
In stitches,
Teresa :o)


