

Done, done, DONE! The hand quilting is finished on "FOOD FRENEMIES," 48 x 48 inches! It was quite the marathon...hand quilted in a week, and a week that was busy with other things.
The deadline for getting it entered into the August AQS Show in Grand Rapids, Michigan was midnight on Friday, April 13 (how appropriate...Friday the 13th). I filled out the form, uploaded pictures, and pressed "send" at 10:30 PM.
Whew! WAY to close for comfort!
Sometimes I think I "use" quilt shows to motivate me to finish things rather than add to my pile of UFOs.
The nine center squares are quilted with cross-hatch design. I also outline quilted around the motifs with some quilting on the motifs to bring out details or add fill on larger pieces.
It is not done for this picture, but I quilted a small fish in the shark's gray belly...maybe it should have been another Hershey's Kiss.


I basted the quilt sandwich so severely, especially the outer border. I wanted to make sure nothing on the outer border shifted or stretched into a "wave."
That sucker was completely flat and square as a flimsy, and I wanted it to stay that way!
For the first time in my life, I quilted the outer border before the middle border. Again, I wanted to get the binding on and guarantee flatness and squareness before using my hoop to quilt the green middle border.
I will show you how I made my quirky outer border design.
Notice how my old sad irons keep the quilt perfectly still and stable while I design and mark...especially good to keep the quilt, which is hanging off the table, ON the table.
Also sad irons weigh down my rotary rulers nicely while I mark. Good investment of $20 bucks total for the three of them.

First I find the absolute middle of the quilt border, and weigh down my longish rotary ruler with as sad iron. Then I line up the center line of my homemade template **.
Next I spread out identical templates to one side of the center at a time and work to get them properly spaced.


To keep them from moving as I start tracing and marking, I weight them down with my vintage pattern weights.

I use a very light pencil line (0.5mm lead) to trace.
Then I use one of my Perfect Circles (Karen Kay Buckley), marking the seam line and center, to line up with my triangles to form an arch. (I use a write on/wash off marker on the plastic circles.)


Then I marked echoing lines for both shapes. I usually do more echoing on the rounded arches, but I was afraid I was making things too busy behind my arrow-fleeing M&M guys.
I may go back and fill in more quilting later because I am not completely satisfied with the unquilted spaces on that outer border.
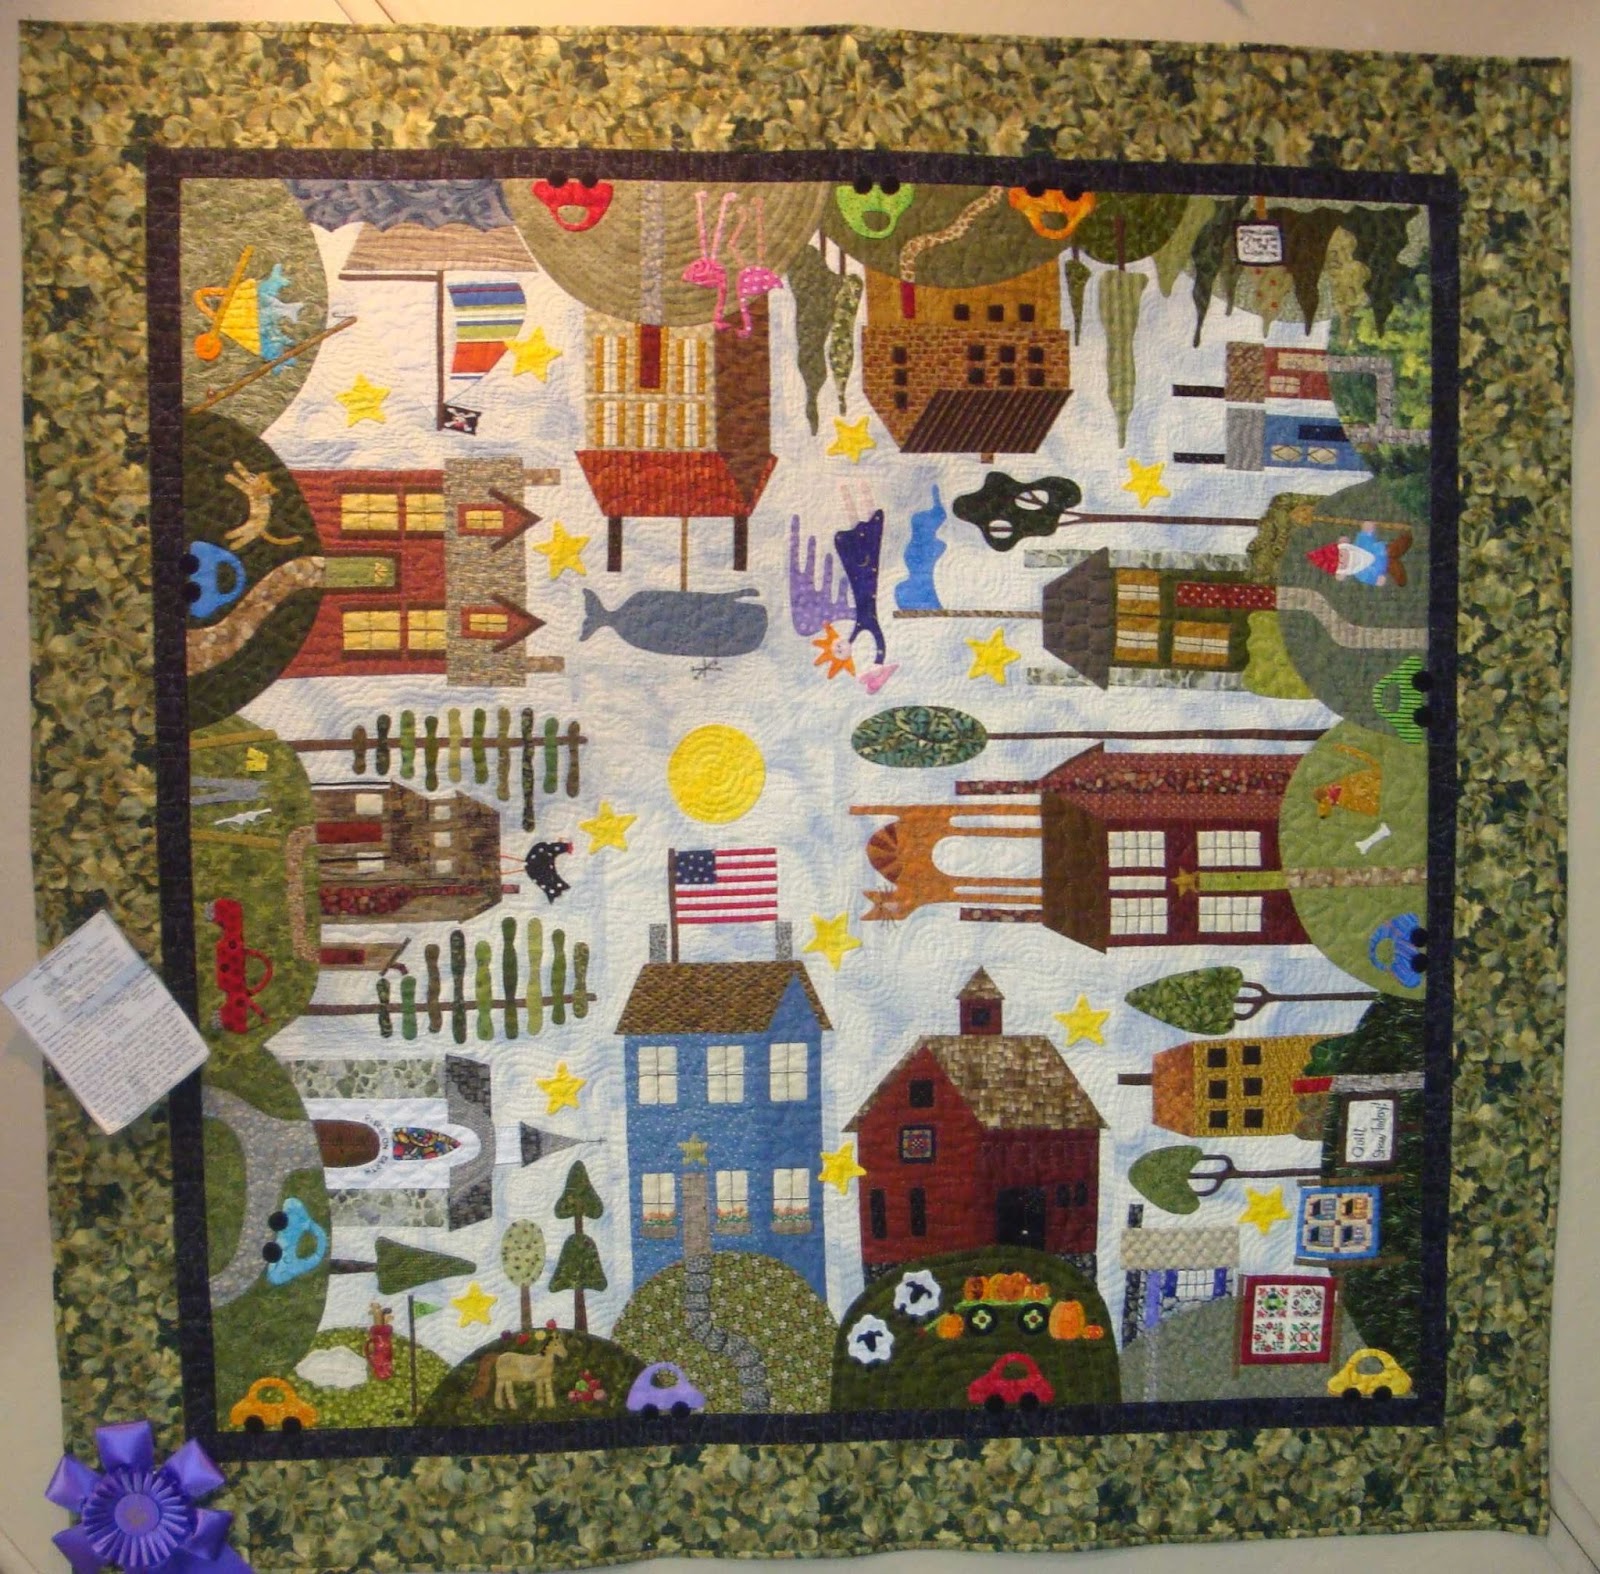
I've done this outer border before. Here it is on "ALL AROUND THE TOWN" (base pattern by Sue Garman...I miss her...). It is a little hard to see the outer border quilting due to the business of the fabric, but you can just...make...it...out.

To make the quilting quicker and more enjoyable, I thread 20 needles at a time and wind/load them into my quilt domed needle holders (Clover Domed Threaded Needle Cases).

Everything is like a little assembly line...I cut 20 lengths of quilting thread first. You can tell I am near the end of this spool of YLI Glazed Quilting Thread by the tight little coils.
Then I sit in very good lighting, curse a lot, and finally get those tiny little quilting needles threaded (sucks to get older...).
They say not to knot the thread before winding in the domes, but I find I can if I load and wind the needles in order, 1-10, in the pre-numbered slots, then use them in order as I quilt I don't usually have a problem. Maybe that is due to the thread glazing.
Even if I get a tangle, there is an easy way to open up the holder to correct things. I love these domes! I found I was going through 20 threaded needles pretty fast, so I ordered another two domes!
Forty needles should do me for a while!
(Twice the cussing and threading, but also twice the serenity-filled hand quilting...priceless.)

There was so much linear, geometric quilting in the rest of the quilt that I decided to add something rounded and softer for the middle border. I did this the same way I did the spiky outer border, using half circles of waste plastic, tracing with one of my smaller Perfect Circles marking a center line before cutting the waste plastic in half.
I love Perfect Circles!
I'm sure someone has thought of this simple border design, but I have not seen it. I will definitely be doing this again...I really like the results.
I do have commercial plastic quilting templates, but sometimes it is just quicker to do something like this rather than trying to make the template repetitions fit my border size.

I love keeping the the quilt on the table using my sad irons. VERY helpful while applying binding to keep the weight of the quilt from pulling while hanging off the table (also great when applying borders to flimsies).
I quilted this sitting at a table, and the sad irons were so helpful.


The quilt is off by UPS to NW Ohio for the Sauder Village Quilt Show next weekend. I have exhibited quilts in that show for many, many years. I am hoping to keep up the tradition even thought I have moved south.
It is a very nice show, placed in a historical tiny village that also contains the Threads and Traditions quilt shop, small vender mall, and the Barn Restaurant, out in the middle of nowhere in a farming community...one stop total enjoyment! They display hundreds of quilts. There are two nationally known quilt teachers every year. This year, one of them is Edyta Sitar.

I need to learn NOT to save the making of the my labels until the last, frantic moment. I've gotten better because I have been trying to incorporate them into the binding. This label was very hastily designed...no descriptive messages. I was going to doodle a small yellow M&M on it, but ran out of time (he is my favorite...even though I tried to kill him).
I can't center writing on labels to save my life (astigmatism), so I select an easy-to-trace, easy-to-read font on my computer, type, and print. I use that as a guide.

I also iron freezer paper to the wrong side of the label fabric (cut larger than needed) to stabilize things as I trace. I use my light box and it works great!

I still need to make a second one of these quilts for someone, but I already have the second set of blocks made and sashed. Next I will applique the letters and M&Ms. I have also got other projects going, maybe not as crazy as this one was.
I think this "FOOD FRENEMIES" quilt won't impress the serious major quilt show judges, but I am still going to send it off to make the show rounds...maybe it will give some people a chuckle as they relate.
In stitches,
Teresa :o)
**Some of you with a science background might recognize the source of my blueish template waste plastic. Back when I was younger and childless, I worked in biomedical research. I ran "gels" with radioactivity to separate proteins, then would develop them on large format sheets of film to see what the isotope revealed.
There was always waste developed films, usually resulting from being loaded incorrectly, in the garbage of the shared darkroom, sometimes resulting from work with fluorescent markers that weren't radioactive. I would check them out with a Geiger Counter, and take home the ones that weren't dangerous.
Waste not, want not. I still have some pieces after 20 years!
Wow! I loved this close up look at your process...you are an amazing quilter!
ReplyDeleteWhat a great quilt. Love the quilting you did. I've used all sorts of clearish plastics for templates. Is this quilt your pattern? I trace my labels the same way. Something to be said for nice fonts on the computer.
ReplyDeleteWonderful! You do such delightful things. Good Luck!
ReplyDeleteNice post and some great ideas. Thanks!
ReplyDeleteIt is perfect! Thanks for the great marking tutorial. Marking is my least favorite thing about quilting. Guess that is why I do a lot of eyeball echo quilting. If this quilt doesn't win awards we need to find new judges! I'm quite sure it will win you another Viewer's Choice. It is a winner with me!
ReplyDeletepretty neat and so original how you came up with all this is beyond me! Hope you get something in the show
ReplyDeleteI've loved your blog for many years and your pictures of the Sauders Quilt Show. I retired in Feb and signed up to go to the show and take classes next week. I am SO EXCITED that I'll get to see this quilt in person!!! What a thrill. I also went to Lancaster and saw your anniversary quilt there. What a great talent you have and share with us all.
ReplyDeleteCongratulations, its DONE!!
ReplyDeleteYeah all done...it turned out beautiful...should be another show winner. Judges look for unique quilts and this fits that category...great quilting and FAST...
ReplyDeleteI think this is a great quilt and so relevant to those of us who love sweets and other foods which may not be healthy for us even in small quantities. Please consider entering this in the Road to California show which is held in January. Thanks so much for sharing!
ReplyDeleteYour work is amazing and I enjoyed reading about all your processes. The quilt is outstanding and having a deadline definitely helps motivate one to get busy. Good luck! The quilt show sounds like such a fun one to attend.
ReplyDeleteBesides the great quilt, this post is FULL of such terrific info--thanks so much for taking the time to do it. Good luck with the show rounds--definitely look in to Road to CA, show is January 2019.
ReplyDeleteThis is just so stinkin cute. Who cares if quilt show judges aren't impressed, the rest of us are!!!!!
ReplyDeleteOh yay! You meet the Gr Rpds deadline. It sneaks up so early. I applaud you. Perhaps you’ll enter it in Fall Paducah? Another yay that Frenemies will be at Sauder Village. I love that show! Gosh, I think you beat your own quilting record of getting this quilted in a week. Appreciate you sharing “keeping the borders flat” tips.
ReplyDeleteIf those quilt judges don't see and recognize the meticulous work in your quilt not to mention the originality of your design - then BAH HUMBUG on them.
ReplyDeleteHoping to get to see this at Sauder Village!
ReplyDeleteLike always, quite impressed with quilt and blogpost!
ReplyDeleteI love you work!
ReplyDeleteI also miss Sue Garman.